When you are working in Photoshop, then you must be knowing some basic techniques about using some commands. Here I’m going to write down some important Photoshop Tips and Tricks, I bet if you are professional then it will save a lot of your time while Designing, hope you will like these.
1. How To Select All Text Layers At Once
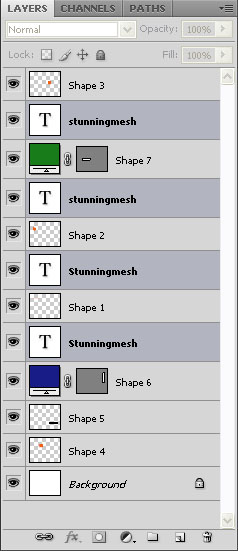
Suppose you have written a lot of text in different layers and also you have made some more objects. Now you need to select all Text layers at once. It is very simple, just select any text layer and run the command, Select >> Similar Layers, all text layers would be selected at once.

————————————————
2. Selecting All Text On A Type Layer
If you have written text in a single layer and you want to select all this text at once, just open Layer Panel and double click on the thumbnail of the text layer. All text would be selected.

————————————————
3. Selecting Text in Text Layer
i. Selecting A Single Word
To quickly select an entire word in Photoshop, simply double-click directly on the word.

ii. Selecting An Entire Line Of Text
To quickly select an entire line of text, just triple-click anywhere on the line.

iii. Selecting An Entire Paragraph
To quickly select an entire paragraph of text, quadruple-click anywhere on the paragraph.

————————————————
4. How we can change the Size, Shape, Behavior of text while using Shortcut Keys? (like Coreldraw)
CHANGING THE BEHAVIOR OF TEXT:
Instantly Make Text Bold:
If you need to make some text bold, simply highlight the text with your mouse and press Ctrl+Shift+B (Win) / Command+Shift+B (Mac).

Instantly Italicize Text:
To instantly italicize text, simply highlight it and then press Ctrl+Shift+I (Win) / Command+Shift+I (Mac).

Superscript Text:
To superscript text, highlight it and then press Ctrl+Shift++ (Win) / Command+Shift++ (Mac).

Subscript Text:
To subscript text, highlight it and then press Ctrl+Shift+Alt++ (Win) / Command+Shift+Option++ (Mac).

Strike-Thru Text:
To strike-thru text, highlight it and then press Ctrl+Shift+Alt++ (Win) / Command+Shift+Option++ (Mac).

Adjust Baseline Shift:
To raise or lower the baseline shift by 2 points, hold down Shift+Alt (Win) / Shift+Option (Mac) and use the Up or Down arrow keys on your keyboard.

To raise or lower the baseline shift by 10 points, hold down Ctrl+Shift+Alt (Win) / Command+Shift+Option (Mac) and use the Up or Down arrow keys.

CHANING THE SIZE OF TEXT:
Convert Text To All Caps:
To quickly convert text into all caps, highlight the text and use the keyboard shortcut Ctrl+Shift+K (Win) / Command+Shift+K (Mac).

Convert Text To Small Caps:
To quickly convert text into small caps, highlight the text and use the keyboard shortcut Ctrl+Shift+H (Win) / Command+Shift+H (Mac).

Quickly Resizing Type:
To enlarge or reduce the size of your type by 2 points, highlight the text, hold down Ctrl+Shift (Win) / Command+Shift (Mac) and press the < or > keys on your keyboard.
To enlarge or reduce the type size by 10 points, highlight the text, hold down Ctrl+Shift+Alt (Win) / Command+Shift+Option (Mac) and press the < or > keys.
LINE SPACING AND CHARACTER SPACING:
Quickly Adjust Leading (Line-spacing):
To quickly adjust the leading (the amount of space between two or more lines of text) by 2 points, simply highlight the lines you want to adjust, hold down Alt (Win) / Option (Mac) and use the Up or Down arrow keys on your keyboard.

To quickly adjust the leading by 10 points, hold down Ctrl+Alt (Win) / Command+Option (Mac) and use the Up and Down arrow keys.
Quickly Adjust Tracking (Space Between Groups Of Letters):
To quickly adjust tracking (the space between groups of letters or entire lines of text) by 20 em, highlight the lines you want to adjust, hold down Alt (Win) / Option (Mac) and use the Left or Right arrow keys on your keyboard.

To quickly adjust tracking by 100 em, highlight the lines you want to adjust, hold down Ctrl+Alt (Win) / Command+Option (Mac) and use the Left or Right arrow keys.
ALIGNMENT OF TEXT:
Left-Align Text:
To quickly left-align your text, simply click anywhere inside of it and press Ctrl+Shift+L (Win) / Command+Shift+L (Mac).

Center-Align Text:
To quickly center-align your text, click anywhere inside of it and press Ctrl+Shift+C (Win) / Command+Shift+C (Mac).

Right-Justify Text:
To quickly right-justify your text, click anywhere inside of it and press Ctrl+Shift+R (Win) / Command+Shift+R (Mac).

————————————————
5. How to change Font Preview size in the Font List box?
Interesting Photoshop Tips and Tricks is, suppose you have written some text in any file. Now you want to give this text different fonts and you wanted to see the larger view, just run the command Edit >> Preferences >> Type and switch on Font Preview option and select any one from Small, Medium, Large, Extra Large and Huge. When you will open the Font list from the top property Panel, then you will see the Font Preview in different sizes.

————————————————
6. How to Hide or Unhide all Panels?
If you want to Hide or Unhide all Panels which are currently visible, the purpose of hiding these panels for a while is to see larger working areas, just press TAB key to hide and then Tab key again to unhide.
————————————————
7. Why mouse pointer is not showing the proper Icons for all tools?
Sometime while working in Photoshop, you must have noticed that when you pick some tool like Rectangular Marquee tool and instead of showing Plus (+) size it is displaying broken Plus sign, or you have chosen Eye Dropper tool and instead of showing Eye Dropper it is displaying round circle with Cross, then don’t worry, just see Caps lock must be on, just switch of the Caps Lock and all tools mouse pointer would come in their normal shapes. (be sure to select Standard option in Edit >> Preferences >> Cursors).
————————————————
8. How to change the View of the document, in other word how to Zoom In and Zoom Out by using Shortcut keys?
Simply press Ctrl + Plus(+) to Zoom in, Ctrl+Minus(-) to Zoom out, Ctrl+Zero(0) to Fit in the Screen, Ctrl+1 to view Actual Pixels.
————————————————
9. How we can add new Layer behind the Current Layer?
If you want to add a new layer but it must come under the current selected layer, then before clicking on the Create Layer icon in Layer panel, just hold Ctrl key.
————————————————
10. How to change the number of Grids in Curve Dialog Box?
Suppose you run the command Image >> Adjustment >> Curves and By default, Photoshop does not display many Grids in Curves dialog box. It displays only a 25% grid. We can change that though and increase it to a 10% grid simply by holding down Alt (Win) / Option (Mac) and clicking anywhere inside the grid.

————————————————
11. How we can repeat Transform Command or we can Copy the object after Running Transformation?
Suppose you have made any object and then by picking Move Tool you press Ctrl+T (Win) / Command+T (Mac) (Transform) and then rotate it and then press Enter key. Now you want to repeat this Transform again, then simply press Ctrl+Shift+T (Win) / Command+Shift+T (Mac)
But if you want to copy the object while Transforming, simply press Ctrl+Alt+Shift+T (Win) / Command+Option+Shift+T (Mac). I’m going to give you example of this command:
Step1: Draw any object.

Step 2: Pick Move tool and press Ctrl+T (Win) / Command+T (Mac). Hold down Alt key and move the Center Node towards the Bottom Center. Then take mouse pointer outside of the object and you will see Rotation Nodes, Hold down Shift key and rotate the object towards any angle and then Press Enter to confirm it.

Step 3: Now press Ctrl+Alt+Shift+T (Win) / Command+Option+Shift+T (Mac).
————————————————
12. How we can Navigate from one File to other open Files?
Last but not least, among Photoshop Tips and Tricks is, suppose you have opened some files and you want to move from one file to another, then simply press Ctrl+Tab to move forward and press Ctrl+Shift+Tab to move backward.
————————————————
Hope you like these Photoshop Tips and Tricks.


very nice tips and tricks especially the last one has enhanced my knowledge of PS. thanx for sharing
These tips are very helpful for Photoshop users.
thats is good for me.for reference, coz i need many tutorial like that.
thanks sir.
GOD BLESS U
hello sir
Congratulation on your blog
upload some videos of your blog on youtube
like these
http://www.youtube.com/watch?v=BShE_jS8jLE
http://www.youtube.com/watch?v=qxgRneI6yfY
http://www.youtube.com/watch?v=ZPOGXYJtafw
i hope these type of videos will make this blog popular
Salam
Sir its very good site.and every one will get alot of informaiton …
Hi Salam,,
its really welldone Sir.Keep it up with your relentless effort to explore the undiscover world.
Wish you all the best.
faraz
AOA
very nice sharing Sir
Hi
very informative post and last one is new for me Thanks 🙂
very help full this thx sir
Hi,Its marvellous effort!it really stunning as tis name shows!for those who want to know how to!its a free guide provided by Mr genious.I can only expect these type of things from you.Dont stop it N keep it up My All wishes N blessing are with u> Thanks N best of luck for