It is very long Photoshop Tutorial, here you will create Analog Clock in Photoshop. You can use any pattern behind the clock or any picture. Some new Techniques for you to learn in this Tutorial, hopefully you will enjoy making your own Clock in Photoshop. Lets start.
Final Result of Analog Clock in Photoshop:
1. Take new file of any size, I’m taking 600px x 400px size with 72 resolution.
2. Double click on the name of Background Layer in Layer Panel and write any name of layer and hit Ok. Now run the command Layer >> Layer Style >> Gradient Overlay. Select Radial from Style list box and chose any two colors of your own choice. (I’ve chosen #212d53 and #3f4990) and click ok.
3. Now run the command Layer >> Layer Style >> Pattern Overlay and chose any pattern. But don’t forget to make the Opacity to 30%. Then Click Ok.
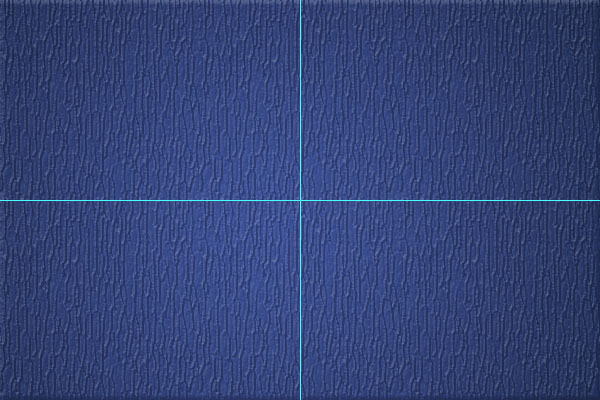
4. Now you have to place Horizontal and Vertical 2 Guide line in the Middle of the file. To do so, run the command View >> New Guides. Select Horizontal in Orientation and give the value 200px. (As we have taken 400 height file, so half is 200, so write 200px here please) and click Ok. Again run the command View >> New Guides, this time select Vertical in Orientation and write 300px (As we have taken 600px wide file, and half is 300, so write 300px here please, don’t forget to write px in the last).
5. Now pick Ellipse Tool and draw a Circe of any size in the middle (don’t forget to switch on Shape Layers option in the Top Property panel). To draw a complete Circle Hold down Shift key while drawing a circle (It may be of any color, don’t worry). After drawing the circle go to Layer Panel by pressing F7 key and right click on newly created circle’s layer and select Rasterize Layer). After drawing the circle centralizer this circle in the middle of the file, to do so pick Move Tool and press Ctrl+A to select whole file. You will see Alignment option on the Top property Panel select both Middle options (i.e. Center Horizontally and center vertically).
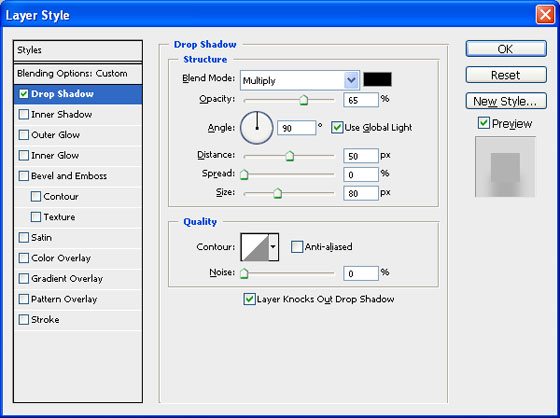
6. Now run the command Layer >> Layer Style >> Drop Shadow. and give the following values:
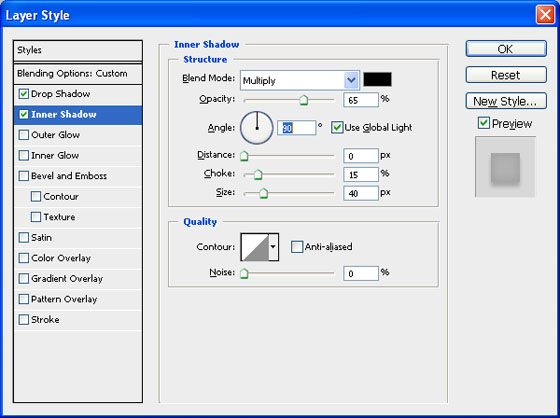
Don’t hit ok please, click on Inner Shadow now and give the following values:
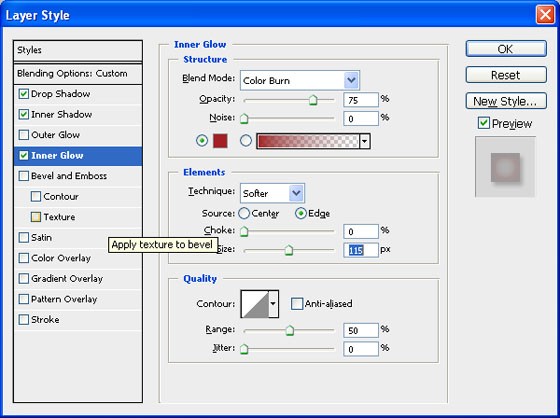
Again don’t hit Ok, click on Inner Glow now and give the following Values:
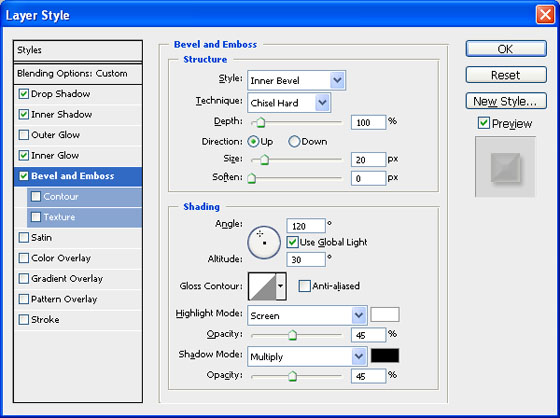
Again time didn’t come yet to hit Ok, just click on Bevel and Emboss option and give the following values:
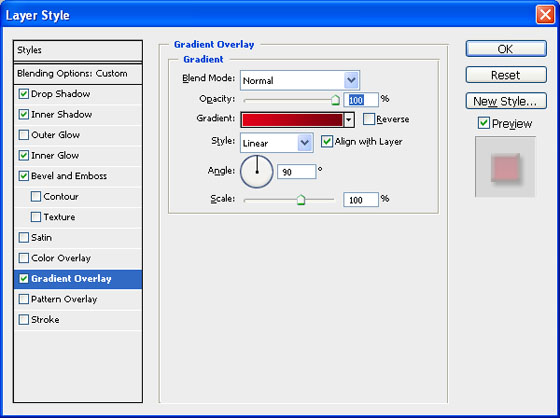
Don’t hit ok please, last one option remain to check and i.e. Gradient Overlay, give the following values:
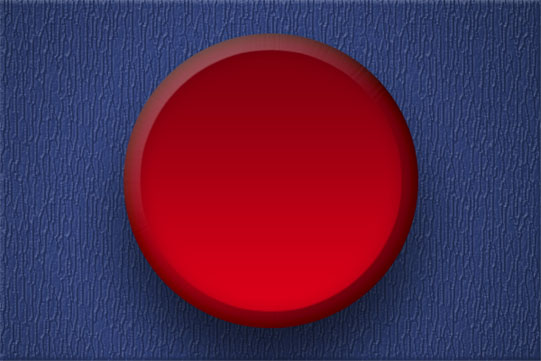
you will get the following:
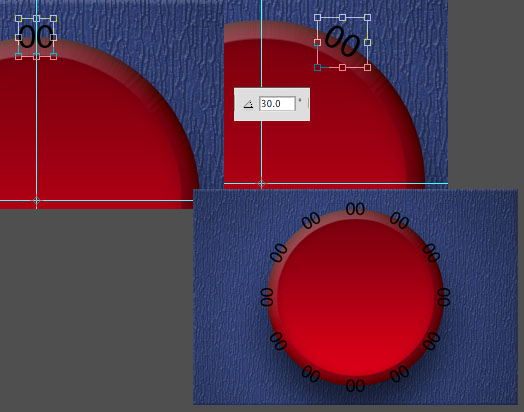
8. Now take Horizontal Type tool click anywhere in the file and write 00 (chose any font and color of your own desire). While writing text don’t forget to change the Alignment from Left to Center. Pick Move tool and press Ctrl+A and align it Center Vertically and Center Horizontally. Now move this text to Top of the circle, press Ctrl+J to copy this text and press Ctrl+T and hold Alt key and pick center node and move it to the Center point of the file where Horizontal and Vertical Guide lines are crossing each other, type 30 in the Angle box in Top Property Box. You have to copy main text 11 times and each time move the center point to the center point of file and change the angle each time, you will get this:
9. Now while using Horizontal Type tool edit each text and write 1, 2, 3, upto 12 relatively and change their angles back to their normal Horizontal straight position. then select all Numbers layers and press Ctrl+E to merge these and use following properties by running the command Layer >> Layer Styles >> Outer Glow, Bevel and Emboss, Gradient Overlay one by one and give the following values:
Outer Glow:
Opacity = 56, Color = #a32025. (leave all other settings as it is)
Bevel and Emboss:
Style = Pillow Emboss, Size = 2, Soften = 0, Highlight Mode Opacity = 30, and Shadow Mode Opacity = 30.
Gradient Overlay:
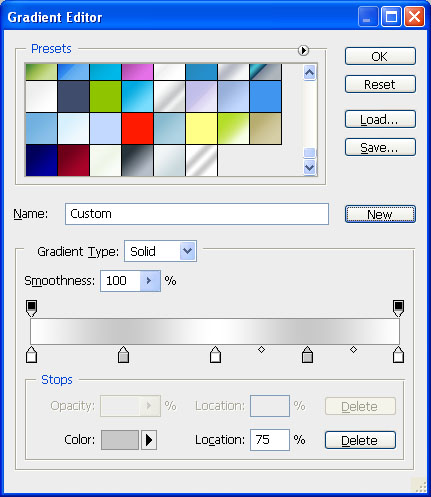
#ffffff, #c8c8c8, #ffffff, #c8c8c8, #ffffff (Click New to add this gradient to the presets field because it will be used later again)
Now press Ctrl+T to reduce the size of all numbers to fit inside the Circle like:
10. Use Custom Shape Tool (U) and choose the pencil shape from the drop down menu at the top. Drag out a shape to make it look like a short, thin hour hand. Rename this layer as “Hour Hand”. Press Ctrl+J to copy this layer, now you have to change its height. While using Rectangular Marquee tool
, select upper part of this pencil and then pick Move tool
and press Shift+Up Arrow and then Shift+Down Arrow (to separate the part) and Press Ctrl+T, and change the height a little bit. Like:
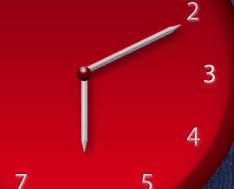
Rename this layer as “Minute Hand”. change the angle of this Needle layer and give the following settings to both Needles:
Drop Shadow:
Opacity = 55, Distance = 5 (14 for the “Minute Hand”), Size = 9.
Inner Shadow:
Opacity = 30
Bevel and Emboss:
Technique = Chisel Hard, Size = 9, Highlight Mode Opacity = 55, Shadow Mode Opacity = 55.
Gradient Overlay:
Use any Color of your own choice.
11. Now we are going to make the Center point where needles would be joined. Use Ellipse tool and draw an small circle and give the following property to it:
Bevel and Emboss:
Size=6, Angle=101, Altitude=64, Highlight Mode Opacity = 75 Shadow Mode Opacity = 75
Drop Shadow:
Just Switch on this command, no need to change anything.
12. Now we are going to put some Shiny Stars. First of all take new Layer and then take Brush Tool and make its opacity 50%, use any star and click on some parts, where you want to show shiny stars.
13. Now we are going to make some Solarize effect, for this purpose we are going to take a new file of same height and width, I’m taking 7×7 inches file with 300 resolution.
14. Double click the Background layer and hit ok, it will change the name of Background layer to Layer0, press D to restore the default (black and white) color in color palette and press Alt+Backspace to till Black color.
15. Run the command, Filter >> Render >> Lens Flare and give the following values:
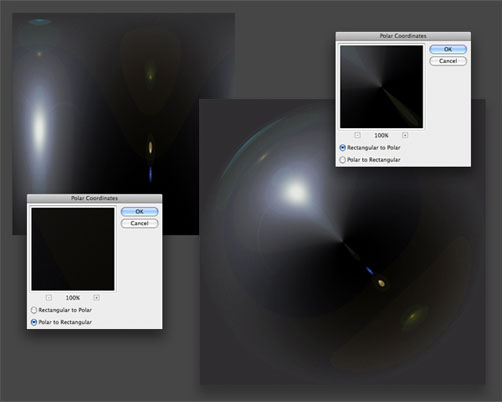
16. Now run the command Filter >> Distort >> Polar Coordinates. Select Polar to rectangular and hit Ok. Press Ctrl+T and right click anywhere and select Flip Vertically and press <enter> key. Again run the command Filter >> Distort >> Polar Coordinates and now select Rectangular to Polar this time.
17. Now we need center Circle part to cut. To take exact center part draw Horizontal and Vertical Guidelines (like we drew in Step 4 above). Move mouse pointer to the center part (where both guidelines intersected each other), hold Shift + Alt key and move pointer towards the outside. Select the center part and leave the mouse pointer and Shift+Alt. Now press Ctrl+Shift+I to inverse the selection and press Del key to delete that part. Now move this center part to your previous file.
18. Pick Move tool, press Ctrl+A and from Top Property toolbar, Centralize it Horizontally and Vertically. Now press Ctrl+T and hold any corner and hold Shift key and resize it according to the Circle of our clock. and then change the angle to 45 and press <Enter> key, like:
19. Go to layer panel and change layer mode from Normal to Soft Light. Our Analog Clock in Photoshop is just going to be completed.
20. Run the command Filter >> Render >> Lens Flare, select Lens type to 50-300mm Zoom and 110% in brightness this time. You must be watching a small Preview window above in this box, where a Small + (Crosshair) would be visible, move this cross towards the left side and hit OK. Change the Layer mode from Normal to Soft light.
21. You have to take same circle above the main circle and fill the gradient white on top and transparent at the bottom and draw another small circle and fill it white at the bottom and transparent at the top. You will get this:
Here you are, at last we made it, our Final Result of Analog Clock in Photoshop, Hurray!!!









Well using your permission okay to seize your feed to prevent updated with forthcoming post. Thanks a million and please carry on the rewarding work.
Very useful tutorial. Thank you!