I’m now going to make a a Glass of Juice in Photoshop. This is slightly long technique, so here I’m going to start.
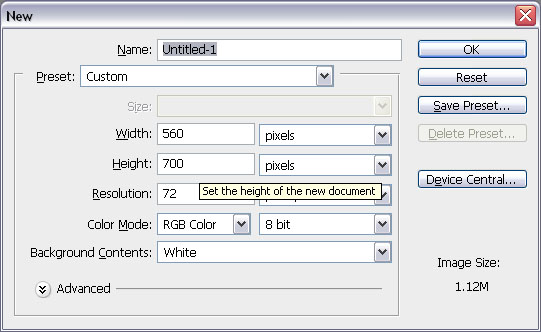
1. Take a new file of any size, I’m taking 560×700 px with 72 resolution and RGB color mode.
2. Now we need to add a Vertical Guideline in the middle of the file, run the command View>> New Guide and type 280 px (because half of 560 is equal to 280).
Here you will get:
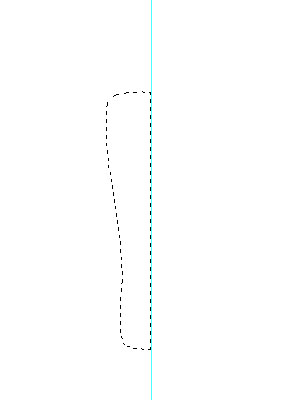
3. Now pick Pen Tool and draw the shape as follows: (hope you will be familiar with Pen tool, if no then visit my earlier tutorials). You have to use Pen tool with Add Anchor Point
tool to make this shape.
4. Now right click anywhere and select Make Selection from the menu, then type 0 in the feather box and hit OK.
you will get this:
5. Create new layer and fill it with any color like black.
6. Now pick Move tool and press Ctrl+J to copy this layer. Then press Ctrl+T and while holding the Ctrl key move the center node towards the right middle node and then right click on it and select Flip Horizontal.

and press <Enter> key.
7. Now go to Layer Panel and select both these layers and press Ctrl+E to merge them. Change the name to Glass.
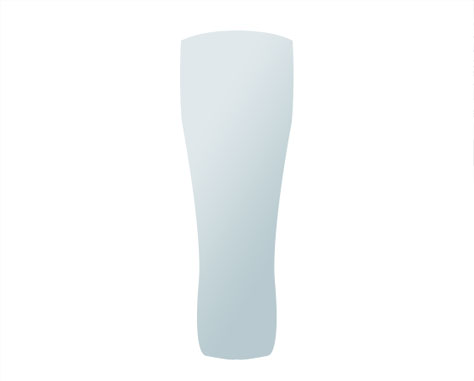
8. Now run the command Layer >> Layer Styles >> Gradient Overlay and give the following values:
you will get this:
9. Press Ctrl+J to duplicate this layer and press Ctrl+T, and in the Top Property bar write 95% in W and 94% in H (we are reducing the height to 94% and width to 95%), press <Enter> twice.
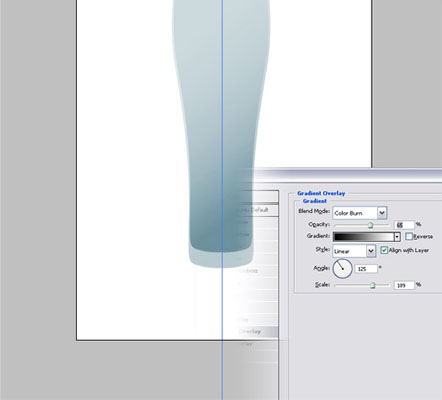
10. In Layer Panel double click on Gradient Overlay layer and in the Layer Panel to change the setting. Set the Blend Mode to Color Burn and Opacity to 65%. Also, change the Angle to 125. Then position the layer, as in the image below.
and this should be result:
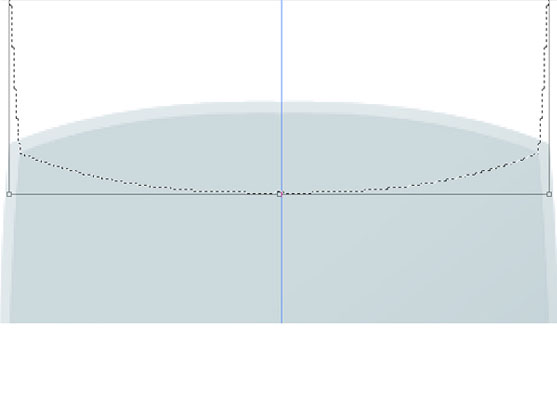
11. In the layer panel click on the newly copied layer by holding the Ctrl key, so that selection around this shape would come. Run the command Select >> Transform Selection. Rotate the selection 180 degree and move the selection on top of the shape like the following and press <enter> key.
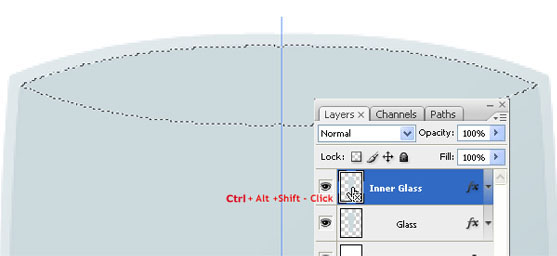
12. Now hold down Ctrl+Alt+Shift keys and click on the newly created glass layer,
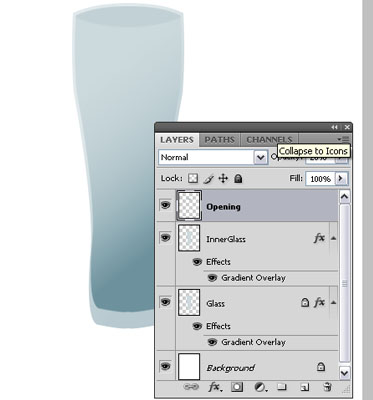
so it will intersect with the selection and you will get on the Ellipse on top of the shape, take new layer (rename it Opening) and fill it with #99b2bb and set layer opacity to 20%.
13. Create new layer and rename it as Reflection. Pick the Rectangular Marque Tool to make a rectangular selection that is bigger than the glass. Get the Gradient Tool
, choose the “Reflected Gradient” preset, which is in the Metals Set.
Then fill the selection with a “Reflected Linear Gradient” from the left to right and press Ctrl+D to un select, as:
14. Go to Image > Adjustments > Curves (Ctrl+M) Then change the shapes of curves to get this:
you will get this:
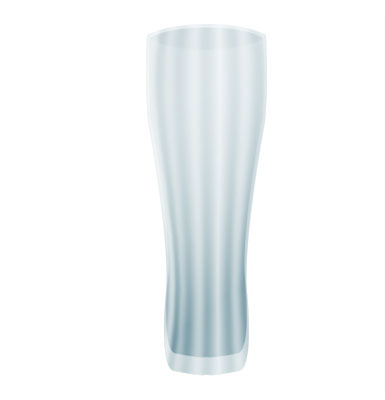
15. Set the “Reflection” Layer Opacity to 50%. Now we are going to make this rectangle as the Glass shape, to do so go to Edit > Transform > Warp. (This will present only CS versions, not in the older versions please). Then change the shape to fit in the shape of the glass. Make sure that it is slightly bigger than the glass, as show in the image below.
press <enter> key to finalize this shape.
16. Hold down Ctrl key and in Layer panel click on the thumbnail of Glass layer and press Ctrl+Shift+I to inverse the selection and press Delete key to delete the extra shape. Press Ctrl+D to deselect. Set the Blending Mode to Screen and Opacity to 60%.
17. Now pick Eraser tool and activate Reflection layer by clicking on it in Layer panel. Keep Eraser opacity to 30% (from top property panel) and erase like show in below picture:
18. Get the Pen Tool (P) , (must select Paths Mode from top property panel), and draw a path as in the image below. Right click on it and select Make Selection, give feather to 0 and hit ok.
19. Go back to the Layers Palette and Ctrl + Alt + Shift-click the “Inner Glass” layer Thumbnail to intersect the selection with the Inner Glass. Create a new layer and name it “Juice.” Fill the selection with color #ffb411. Move the “Juice” layer below “Reflection.” by using Ctrl+[ key Deselect by hitting Ctrl+D.
Here you will get:
20. Apply a Gradient Overlay Layer Style to the “Juice” layer with these settings:
The gradient is centered to the layer. We want the bottom to be brighter, so we should move the gradient down. You can do it by clicking and dragging while the Gradient Overlay dialog box is open, you will get this:
21. Now we are going to make Bubbles, for this Create new layer (rename it as Circle) and take Elliptical Marquee Tool draw a small Circle, fill it with any Color.
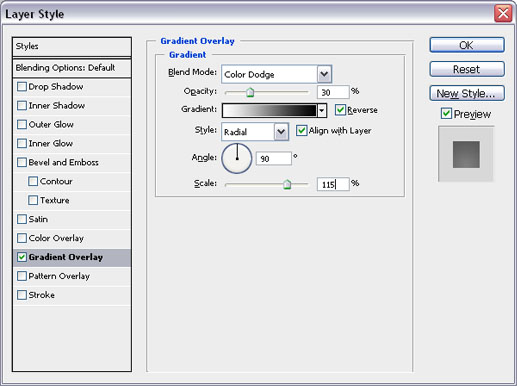
22. Run the command Layer >> Layer Styles >> Gradient Overlay and give the following settings:
Don’t hit Ok, just select Inner Glow on the left and give the following settings:
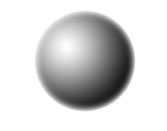
Hit ok and you will get this:
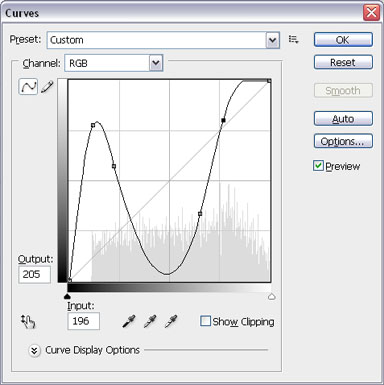
23. Go to Image >> Adjustment >> Curves (Ctrl+M) and make the curves like:
You will get the following result:
24. Ctrl+Click on this Bubble layer thumbnail and run the command Edit >> Define Brush Preset, write any name (like StunningMesh) and hit ok.
25. Now pick Brush Tool and select this newly created brush from its library.
26. Now press D to bring default Black and White colors in Foreground in Color Palette and then press X to exchange their positions, while using ‘[‘ and ‘]’ and creating new layer click on different places like:
27. Ctrl+Click on the Inner Glass layer thumbnail and take new layer over it, now pick Gradient Tool and select Orange color in color palette and while using Foreground to Transparent gradient drag mouse slightly from bottom to top, you will get this:
28. Now pick Elliptical Marquee tool and draw small ellipse at the bottom of the glass, take new layer and fill it with any color (I’m filling with Orange).
29. Press Ctrl+J and Fill it with Yellow color then chose the command Filter >> Blur >> Gaussian Blur.
you will get this:
30. Select background layer and double click on it to rename. Now run the command, Layer >> Layer Style >> Gradient Overlay and give the following settings:
You will get this:
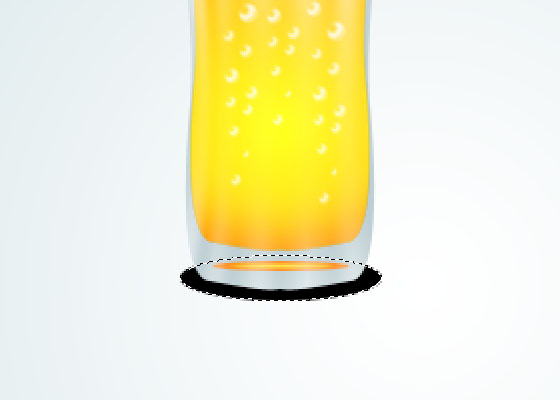
31. Now we are just going to give some Finishing touch, one thing to give it reality, we are going to give Glass Shadow, for this purpose take a new layer over the First layer and draw a small ellipse of Glass width and fill it with Black color.
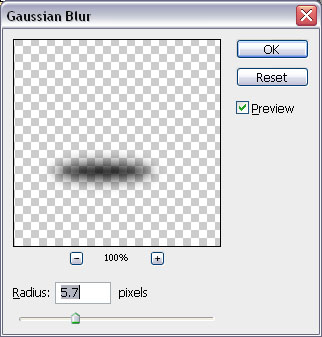
32. Run the command Filter >> Blur >> Gaussian Blur and give the following setting:
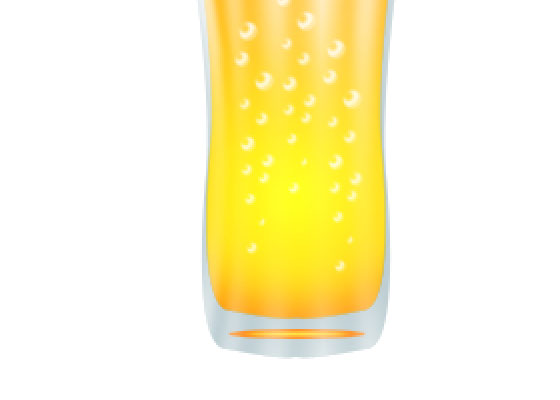
Here you are, here is the Glass of Juice for you, ENJOY!!!




















That was a lot of help. Thanks!!!
good one….thnx….