Probably this technique is used to make Textured Tags using Photoshop, you can modify anything accordingly.
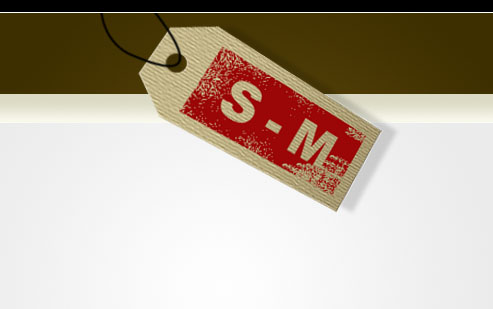
Here is the Final Result of our Textured Tags in Adobe Photoshop Tutorial:
1. Take a new file of any size, I’m taking the file with following parameters:
2. Now pic Gradient Tool , put #685210 color in Foreground and #3e2f00 in Background in Color palette
and Fill type to Radial and fill like this:
3. Create new layer and while using Rectangular Marquee tool select the upper part and fill it with black color like this:
4. Now run the command Layer >> Layer Style >> Sroke and give the following setting:
you will get this effect:
5. Now create another layer and draw a long rectangle and fill it with Linear Gradient (by using #e4e3cf in Foreground and in Background #fdfcf3)
6. Now again take new layer and draw a rectangle and fill it with Linear Gradient (by using #fefefe in Foreground and #ebebeb in background) like:
7. Now pick Rectangle Tool and draw a rectangle of size 240px wide and 100px height.
8. Now by using the command View >> New Guide draw guidelines around this box and inside this box, (distances are Left to Right 35px, Top to Bottom 25px, & Bottom to Top 25px)
9. While using Pen tool draw the following path:
10. Right click on it and select Make selection with 0 feather. Then hit Del key to delete this part:
11. Now by using Elliptical Marquee tool draw an ellipse and delete key:
12. Now go to Layer panel and Lock the Transparent pixel.
Now again pick the Gradient Tool and draw Linear Gradient by using #c6b98d in foreground and #a2946f in background.
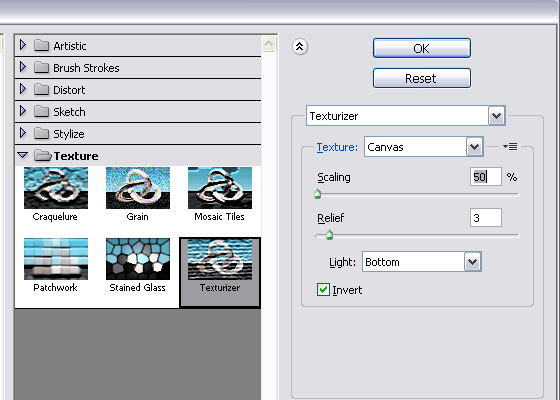
13. From Layer panel remove Lock Transparent Pixels and run the command Filter >> Texture >> Texturizer and give the following settings:
14. Press Ctrl+T and rotate it on 30 degree:
15. Now run the command Layer >> Layer Style >> Drop Shadow and give the following setting:
Don’t hit Ok, just click on Bevel and Emboss and give the following setting:
16. Create new layer and by using Rectangular Marquee tool draw a rectangle of size 170px wide and 70px heigh and fill it with #9f0707 color.
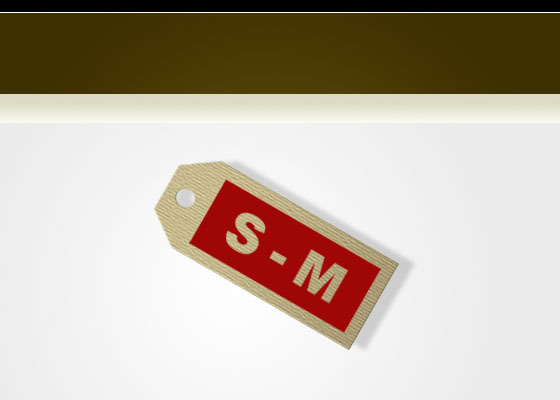
17. By using Horizontal Type Tool write your own text in the middle of Box (I’m writing SM (stunning mesh)), put any font of your desire. Press Ctrl+Left Click on the thumbnail of Text Layer in Layer panel (it will select around the text), now select Red Box layer and hit Del to delete that part. Rotate this box to 30 degree like:
18. Now pick Eraser tool and select the following brush from gallery:
Erase the red box like this:
19. Now again select Eraser tool and select the following brush:
Erase red box like this now:
20. Now select Red and Textured brown box layers and press Ctrl+E to merge these.
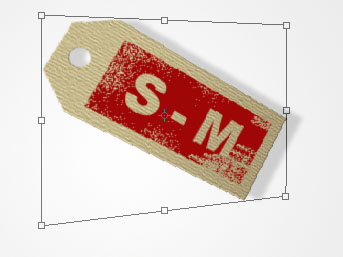
21. Press Ctrl+T >> Perspective & Drag the left Bottom handle up a little bit.
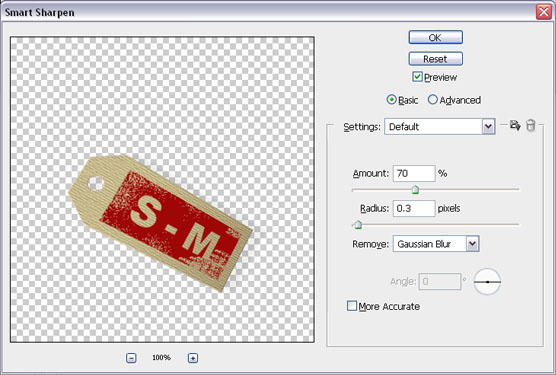
22. Run the command Filter >> Sharpen>> Smart Sharpen and give the following settings:
23. First of all press D to bring Black and white colors in color palette. Now pick brush tool and set its size to 3 px and hardness to 100, (by using dot . and coma , you can change the size of brush and while using [ or ] you can change the Shape of brush). Now pick Pen tool and draw the path like shown below and right click on it and select Stroke path. Then select brush and hit ok.
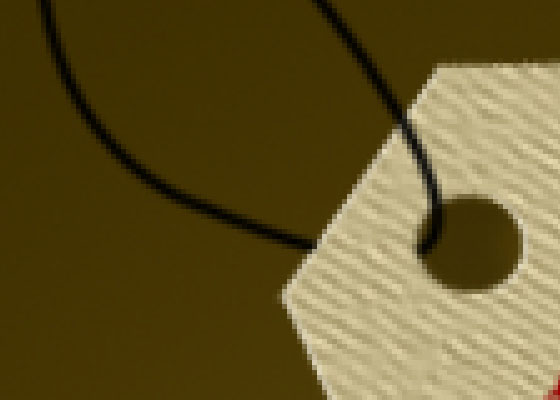
you will get this:
24. Pick Eraser tool and erase the bottom part of Thread very carefully like shown below:
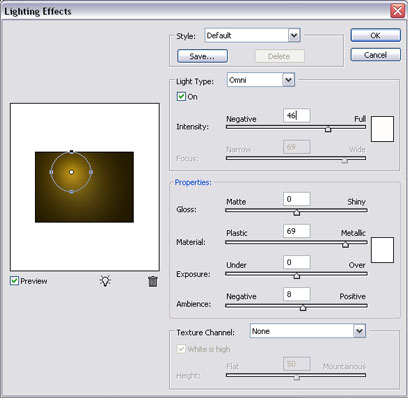
25. Select Dark brown layer and run the command Filter >> Render >> Lighting Effects and give the following settings:
you will get this:
26. Write any text at the bottom like:
So finally we created Textured Tags Using Adobe Photoshop, hope you enjoyed it.









A brilliant post of art work. Every one can learn a new thing from here. This is a kind sharing of you.
Thanks a lot to share such kind of good work
wow, u made my day
very nice one