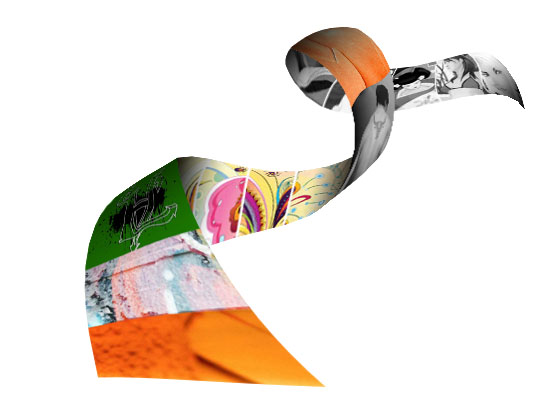
Nice way to present your pictures in a Flying Picture Ribbon in Photoshop, easy technique to do so, you will really enjoy making it.
1. Take a new file of size 560x400px with 72 resolution and RGB color mode. Fill the layer with White color.
2. Chose Pen tool and draw a path like shown below:
3. From your keyboard, press PrintScreen (PrintScreenSysRq) button, now right click anywhere and select Convert to selection, give 0 in feather and hit OK, now run the command Select >> Save Selection, write any name (like stunningmesh) and hit ok. Now take a new layer and then press Ctrl+V to paste the screenshot, now bring your path in front of the File to show only that area. Like shown below:
4. Now bring as many pictures as you need to file and press Ctrl+T one by one for each file and then Goto Edit >> Transform >> Warp command, some nodes would come, by using those nodes, adjust your all pictures inside this path like shown below in few files plz, also change the opacity of each picture from 40% to 60% just to see the Nodes behind the picture, so it will be easy for you to adjust the pictures according to Nodes:
5. Select last picture and press Ctrl + U (Image >> Adjustment >> Hue/Saturation), give the following settings:
Here result would be like this:
6. Now create a new layer and load the selection which you saved (run the command Select >> Load Selection and select stunningmesh). Pick Gradient Tool with following settings and apply on top left corner. Like shown below:
7. Put Gradients on all edges and that places where Ribbon is having twist, like shown below:
8. Now over the first picture draw an ellipse and rotate it at 45 degree then run the command Filter >> Blur >> Gaussian Blur and give setting to 5 like shown below:
9. Give this kind of shadow over other twist as shown below:
10. Now select all Pictures layer and press Ctrl+E to merge them. Now run the command Layer >> layer Style >> Inner Shadow and give the following settings:
11. Don’t hit ok, just click on Drop Shadow and give the following settings:
This result should come:
12. Create a new layer and then select this layer and the Ribbon layer, press Ctrl+E to merge these and run the command Image >> Adjustment >> Brightness/Contrast and give the following settings:
Here is the final result of Flying Picture Ribbon in Photoshop:


