In this Photoshop Tutorial you will learn how to make Folded paper Band in Photoshop. You can use these kind of strips for your designing, hope you will like this.
1. Take and new file of size 560×400 px with 72 resolution and RGB color mode. Fill the layer with any color.
2. Pick Pen tool, create new layer (rename the layer name as UP) and draw the following Top Two shapes and then fill it with lighter color, then draw the following Bottom 3 shapes and fill these with darker color while taking new layer (give the name of this layer as DOWN):

Like shown below:

4. Move the top two shapes over the bottom three shapes like shown below:

5. Now duplicate the top two shapes layer and fill with Black color like:

6. Now run the command Filter >> Blur >> Gaussian Blur and give the following number:
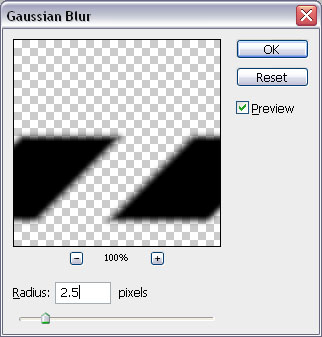
this result should come:

7. Move this layer behind the original like shown below, by pressing Ctrl+[ key.

8. Hold Alt key and click in between this black and previous 3 shapes layer, it will mask with the previous layer:

9. Hold Ctrl+Shift and click on both Red layers, take new layer and fill the selection with any color. Change the opacity of this layer to 0% and run the command Layer >> Layer Styles >> Drop Shadow and give the following settings:

Here is the result which you should see:

10. Use Polygonal Lasso tool and select the left corner of the Bottom Red layer (as shown below) and delete the corner:
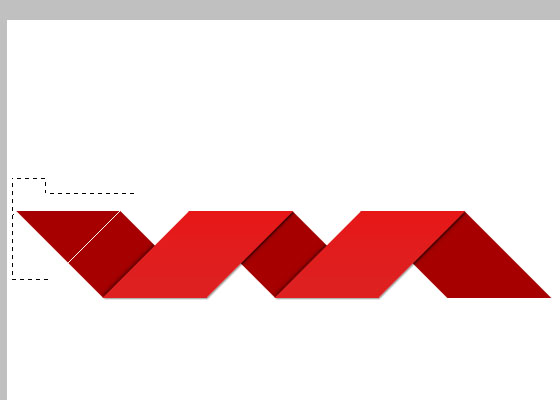
This will remain:

Now select the right area by using same tool and delete that part too, like:

So you can us it any where, here is the Final result of Folded paper Band in Photoshop, hope you enjoyed working on this Tutorial:


sorry but i cant understand step 9, so i think will be nice if u put one more photo to explaim that step more clearly.
Thank your for this awesome tutorial.