This Photoshop Tutorial will teach you how to make Dynamic Backgrounds in Photoshop. We will be creating Star Burst in Photoshop.
1. Take a new file of size 560x400px, with 72 resolution and RGB color mode.
2. Press D to bring default black and white color in the color palette. Then press X to exchange the black and white color from background to foreground.
3. Run the command Filter >> Render >> Clouds.

4. Now run the command Filter >> Render >> Difference Clouds. If you didn’t see some thing like show below, then you can press Ctrl+F as many time, unless you get some like Bright/Contrasted picture shown below.

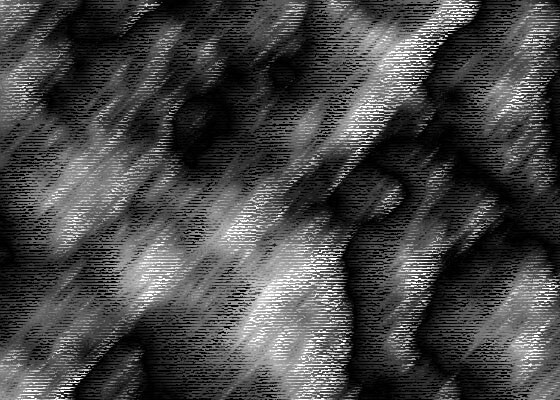
5. Now run the command Filter >> Artistic >> Rough Pastels, give the following settings:
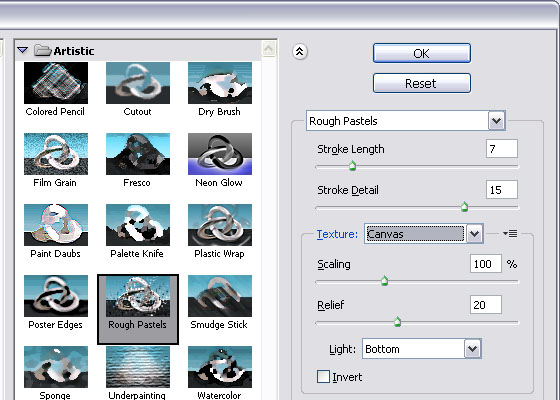
you will get something like this:
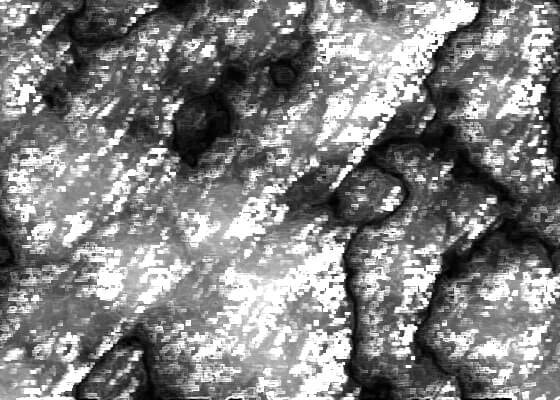
6. Now run the command, Filter >> Brush Strokes >> Accented Edges and give the following settings:

you will get something like this result:
7. Now run the command Filter >> Distort >> Polar Coordinates and give the following settings:

your file will look like this:

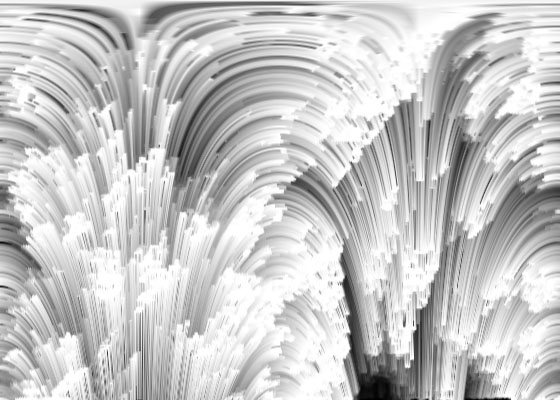
8. Now run the command, Filter >> Stylize >> Wind, give the following settings and hit OK.

Now press Ctrl+F twice to repeat this command two times, you will get something like this:
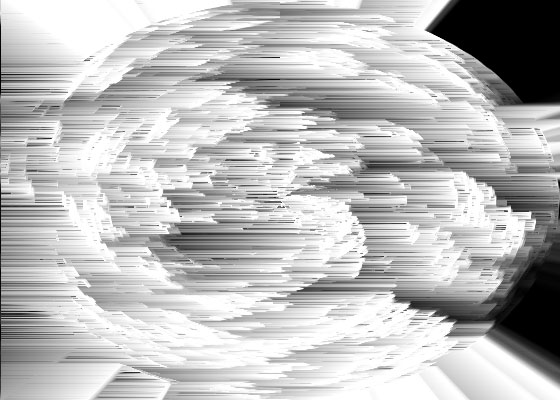
9. Again run the command, Filter >> Distort >> Polar Coordinates, this time give the following settings:

your file should give something like shown below:
10. Now run the command, Image >> Adjustments >> Hue/Saturation or you can only press Ctrl+U, give the following settings:

your file will give the following look:

11. Duplicate the layer (by pressing Ctrl+J) and set the duplicated layer’s blending mode to overlay with an opacity of 30% (from Layer panel).

12. Now run the command Filter >> Other>> High Pass and give the following settings:

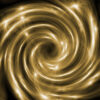
Finally you will get something like this of Star Burst in Photoshop, hope you’ve learnt something from it: