It is very common technique used in Illustrator, but here I’m going to tell you this technique which is called Woodcut Look in Photoshop. Many people like this kind of effect on their pictures, so hopefully you will not feel bore by working on it.
1. Lets start with a Picture, open it in Photoshop. I’m going to work on this file:

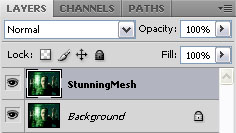
2. From layer panel drag Background layer to Create New Layer icon, it will duplicate the Background layer and its name would come Background Copy. Double click on the name and rename it as StunningMesh.

3. Now from layer panel change the mode of this layer from Normal to Multiply, you will get something like this:


4. Now run the command, Filter >> Other >> High Pass. Type 2 in Radius and hit OK:

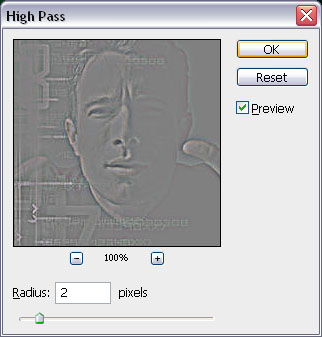
Your picture will look like this:

5. Now run the command, Image >> Adjustments >> Threshold and type 127 in Threshold Level and hit ok:

You will get this kind of result:

6. Now activate the Background by clicking it on layer panel and run the command, Filter >> Blur >> Gaussian Blur and type 6 in the Radius (depending upon the size of your picture, larger the picture greater the radius):
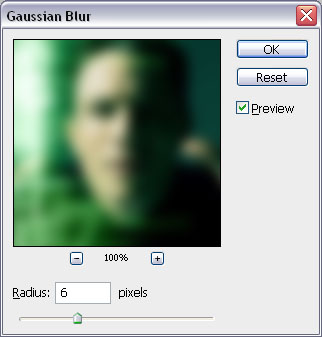
you will get something like this when you hit OK:

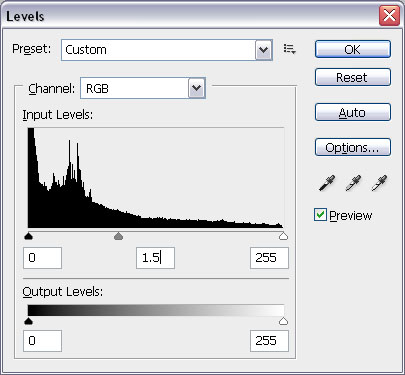
7. If picture looks too dark, like here, just run the command Image >> Adjustment >> Levels or simple press Ctrl+L, you can change the setting accordingly, here I’ve given the following value:
Here you will get the final result of Woodcut Look in Photoshop:

It was really a short tutorial, but hopefully it has taught you some basic commands of Adobe Photoshop and some Basic tools also. Enjoy exploring our other Adobe Photoshop Tutorials, hopefully you’ll like working on those Tutorials and it will enhance your Knowledge about Graphic Design.


nice and simple tutorial