
For the series of Background, here is another dynamic background, this is general called Bokeh Background in Photoshop, very popular technique used in Photoshop to make Bokeh Backgrounds. We are going to make Lighting background.
1. Start with a new file of any size and fill it with Gray (#262626) color. Be sure not to use Black color.

2. Now we are going to create a Brush. First pick Ellipse Tool (U) and create a circle like:

3. Now hide your background layer and select Circle layer and give stroke 4 px in black, hit ok and reduce the opacity of layer to 50%:

4. Run the command Edit >> Define Brush and give any name (like stunningmesh). Now we have created the brush:

5. Press F5 key to bring Brush setting and give the following settings:


6. Your brush setting is completed, now created a new layer and run the command Layer >> Layer Style >> Gradient Overlay and give the following setting:

7. Here is the Gradient result Now change the blending mode from Normal to Overlay in Layer Panel:

It will be like this:

8. Now create a new Set (group) and change the blending mode to Color Dodge. Then create a new layer inside the folder, pick Brush tool and then draw like this:

So by using Brush draw circles like shown below:

9. Now press Ctrl+J to duplicate this layer and hide the original layer. Run the command Filter >> Blur >> Gaussian Blur, type 7 px and hit OK:

10. Now bring your original layer back, move it towards right side not more than 20px:
11. Duplicate the layer again and run the command Filter >> Blur >> Gaussian Blur, but this time give 2 px and also change the position, but this time 3px left and 10px down for better effect, like shown below:

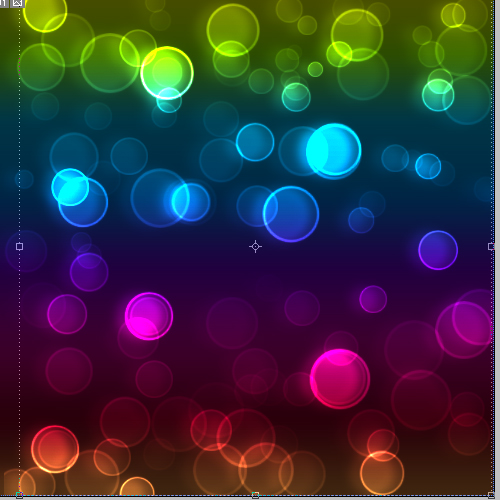
Here is the final result


