
Today I’m going to tell you very simple and interesting technique in Photoshop. By using this technique you will make your text as ECG. I’ve tried to explain this technique in detail. Let us create ECG – Electrocardiography Text Effect in Photoshop!!!
Final result of our Electrocardiography (ECG) Text Effect in Photoshop:

1. First of all take any new file in Photoshop. I’m going to take 560×300 px size.
2. Double click on Background layer and then hit ok, it will change the name of background layer (perhaps it will convert background layer to normal layer).
3. Now run the command Layer >> Layer Style >> Gradient Overlay and make your gradient by using these 3 colors, i.e. 500000 000000 5000000, you will get the following Gradient:

4. Now take new layer and select newly layer and the old one (on which you just given gradient) and press Ctrl+E to merge both. (so gradient effect layer would become normal layer now).
5. Run the command, Filter >> Brushed Stroke >> Sprayed Stroke and give the following settings (remember these would depend upon the size of file):

you will get this kind of effect:

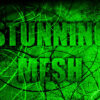
6. Now its time to write your text. Write text in any color, we will change it later. Try to use Strict/Straight font. I’ve used Zurich CN BT font. Write your desire text, I’m going to write Stunning Mesh (All Capitals).

7. Now run the command, Layer >> Layer Style >> Stroke and give the following settings:

8. Put 0 in the Fill Opacity from layer panel, you will get this effect:

9. Take new layer, select it with Text Layer and press Ctrl+E to merge both layers.
10. Pick Rectangular Marquee Selection Tool and select the lower 1 pix area of whole text and hit Del key to delete it:

You will get this text:

11. Now delete some parts of the text as shown below to use only 1 line, at part where line is becoming double, remove those parts, like:
12. Now Pick Line tool and don’t care about color, draw line covering full width of the canvas under the text as:
13. Now its time for some detailing, first of all delete the line from the lower part of the text which is overlapping the text to give effect one single line making this whole text like:

14. Now again pick Line Tool and draw some lines as we see in ECG, upward and downward, then delete the first straight line in between them, like:

15. Select all layers, i.e. text layer, straight line and upward/downward lines and press Ctrl+E to merge these. Now you can change the color, chose anyone you like, I’ve replaced with the following:

16. Press Ctrl+J to copy it and then run the command, Filter >> Blur >> Motion Blur and give the following setting:

you will get this result:

17. Now run the command, Filter >> Distort >> Ripple and give the following settings:

This kind of effect should come:

18. Now select the original lines and run the command, Layer >> Layer Style >> Outer Glow and give the following settings:

Reduce the Opacity of the layer to 75% from layer panel and you will get this final result of ECG – Electrocardiography Text Effect in Photoshop:

Amazing concept! Very nice tutorial
Wow.. I did it!! Thank you so much.
Amazing concept! Very nice tutorial
Welcome to the Hotel California!
SO CUTE!!
Really cool!