Here is very long tutorial, in this tutorial you will be making BlackBerry in Photoshop. A lot things for you to learn in this tutorial. As we found some website are publishing our tutorials as it is without changing even pictures, so we’ll be uploading watermarked pictures now and onward. Lets make BlackBerry in Photoshop.
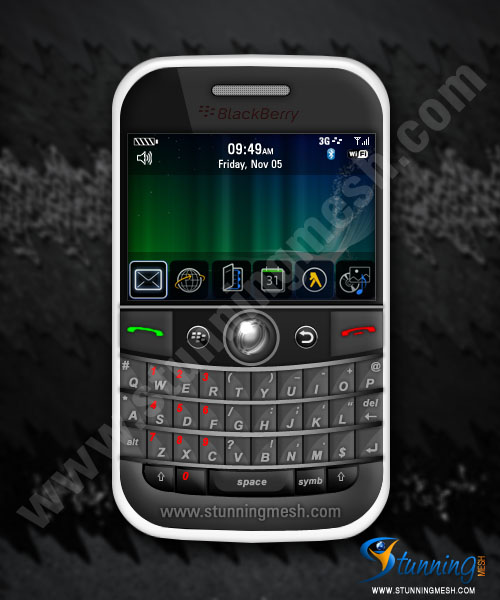
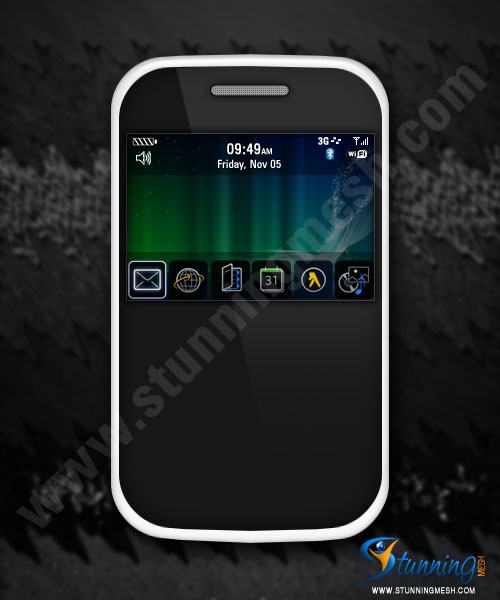
Final Result of BlackBerry in Photoshop:
1. First of all take a new file in Photoshop and put any picture as the background in it. I’ve taken 500x600px size and RGB Color mode and 72 DPI with this picture as background:
2. Now pick Rounded Rectangle tool and draw a rectangle with 50px rounded corners and use Edit >> Transform >> Warp tool to make top and bottom edges a bit round, no worries about color please:
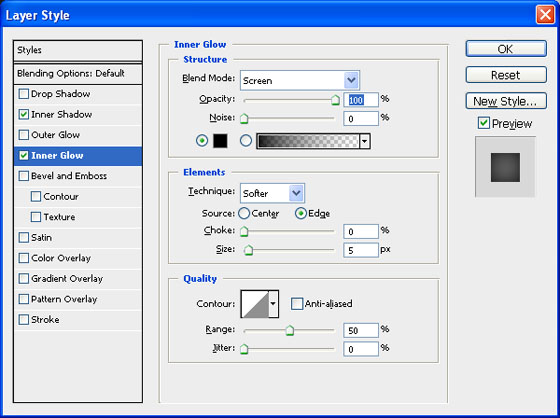
3. Now we have to apply Blending Options to it, Now run the commands, Layer >> Layer Style >> Drop Shadow, Inner Shadow, Inner Glow, Bevel & Emboss, Color Overlay, Satin and give the following settings on relevant boxes:
You will get the following result:
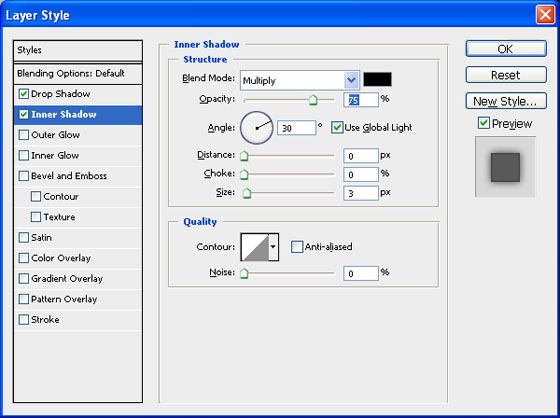
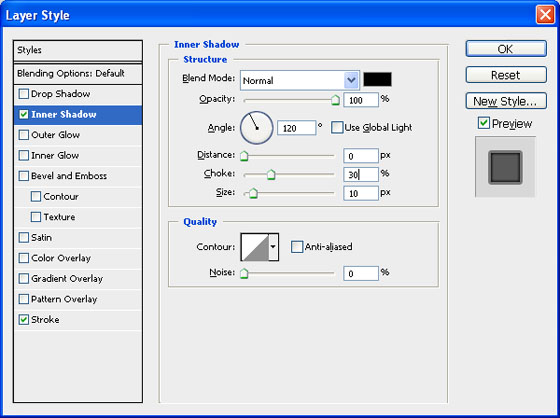
4. Now draw another rounded rectangle with top and bottom slight curved, but smaller in size, with color #171717 and apply the following Blending options to it:
you will get this kind of result:
5. Copy this rounded rectangle, remove Blending options and fill it with white color and reduce the opacity of layer to 10% and remove the left and bottom part like show below:
6. Now draw a small rounded rectangle on top of this rectangle:
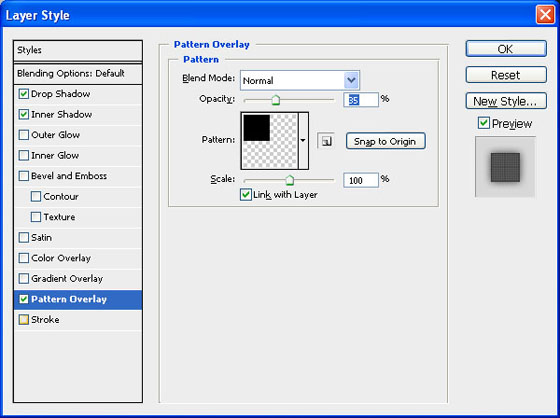
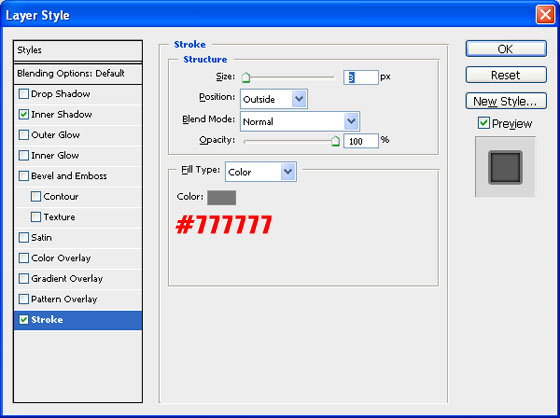
this would be used as Speakers and apply the following settings on it by running the command, Layer >> Layer Style >> Drop Shadow, Inner Shadow, Pattern Overlay and Stroke:
You will get this:
6. Now to make screen you can use any Wallpaper, I’m using the following and giving it slight inner and drop shadow (Layer >> Layer Style) with 25% white outline with 1 px size, like:
7. Now by using Pencil Tool with 1 px size and in white color, draw the Signals Icon, like I’ve done below:
8. Like this I’m going to make Battery icon, Speaker, Wifi, BlueTooth etc. Icons, and also putting some icons on it. please have a look so far:
9. Now I’m going to make the bottom part, first I’m going to make the separation, pick Rectangle Tool and draw a long horizontal rectangle just under the screen and fill it with #737373 color and apply Drop Shadow and Gradient (black white black horizontal), like:
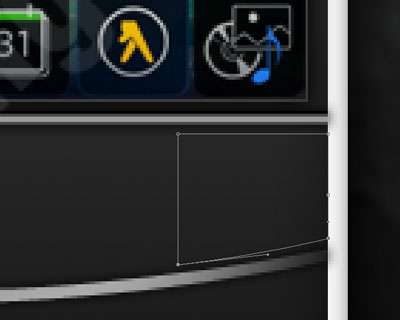
10. Now Pick Pen Tool , take new layer and draw the shape like shown below:
Right click anywhere and select Make Selection, give 0 in Feather and hit OK. Fill it with #9c9c9c color and then right click on the name of this layer and select Paste Styles, you will get something like this:
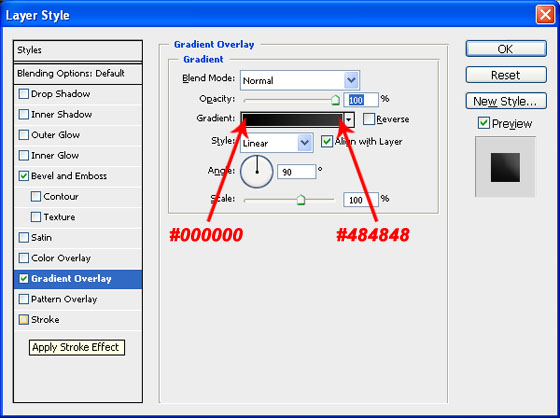
11. Give this layer a slight Drop Shadow and the Gradient (Layer >> Layer Style) as show below:
You will get this:
12. Now by using this technique make 3 More curves, but last curve would be gradually having less bend, like
Infact I’m going to make the Keypad, as black berry has 4 Rows for keypads, so that is why I’ve adjusted partition.
13. Now I’m going to make End/Power key, just zoom in that area and pick Pen tool and draw the shape as shown below:
take new layer, right click anywhere and select Make Selection and fill it with #e9e9e9 color and reduce the opacity to 15%, then apply Inner Shadow, Drop Shadow, Bevel & Emboss (Layer >> Layer Style) according to your desire, I’ve made like this:
14. Press Ctrl+J to copy it and then press Ctrl+T (Transform) and then right click on it and select Flip Horizontal and then adjust it towards the left side, it would be for Send key. As show below:
15. Now I’m going to make Trackball, for this pick Ellipse tool and draw a circle in the middle of these two buttons, and then apply the following blending options:
you will get something like this:
16. Now draw a smaller circle over it and then apply a Built-In Style from the Style Panel, you will get something like this:
17. Now I’m going to put Menu Key and Escape Key also icons on Send & End/Power keys, so I’ve made these keys and placed as show below (I’m trying to reduce this tutorial so that is why didn’t write how I made these, hope you understand it).
18. Pick pen tool and draw the shape at the bottom, as shown below:
take new layer and right click and convert it into Selection and fill it with any color and apply the following Blending Options:
You will get this:
19. Now as we know black berry has keys in 10 columns so I’m going to use Guide lines and I’ve put guidelines equally to make 10 columns like:
20 Now you have to make each button separately and to save time I’ve made all buttons and applied Bevel & Emboss over all buttons, like:
21. I’ve given some detailing over it like:
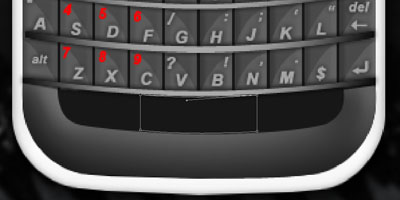
22. Now I’m going to write alphabets and symbols over it as:
23. Now I’m going to make Spacebar, take new layer and by using Pen Tool draw the shape like:
Right click anywhere, convert it to selection and then fill it with any color and apply the following Blending Options:
you will get something like this:
24. By using this technique I’ve also made 2 Shift buttons, 0 and symbol button as:
25. Now finally I’m going to apply some detailing and putting Stunningmesh over it. Here is the final result of BlackBerry in Photoshop Tutorial:

















This is an excellent tutorial. Thank you!