This is a text based tutorial in 3D Studio Max, in this tutorial you will learn how to make a PNG Transparent Icon in 3D Studio Max. We will learn some technique like MeshSmooth, RayTraced Material, Omni Lights and few more. So lets start.
1. Lets start with a new file. Now Create tube from standard primitives with following parameters:
You will get this:
2. Select the object and go the modifiers list and apply mesh smooth to smoothen the edges of tube:
3. Set the following meshsmooth parameters:
Following result should display:
4. Go to the front view. Create sphere in the following position with following parameters:
This kind of sphere would come:
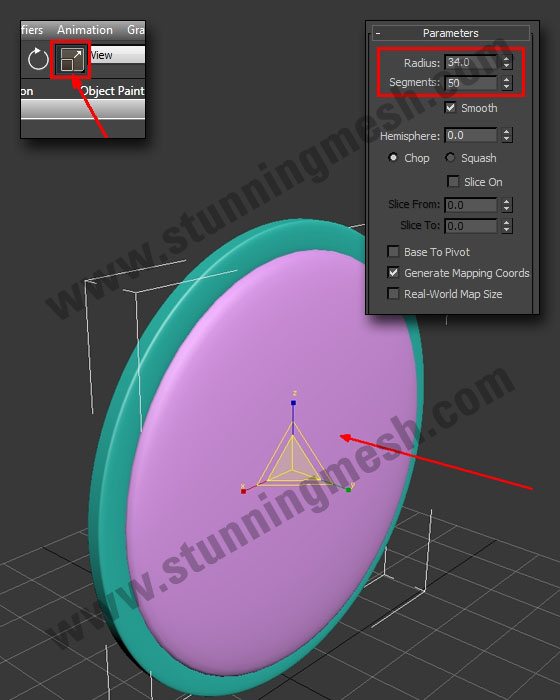
5. Click on “Select and Uniform Scale” button and scale down the sphere towards Y-Axis as show below:
6. Go the shapes and select line:
7. Draw a home with a line on the front view:
8. Select the triangle shape, go to the modify panel, click on the attach button then click on the squares to attach other drawn shapes with
triangle:
9. Select the home, go to the modifiers list, apply Bevel, and change the following parameters:
House Icon would become like this:
10. Press (M) key for material editor, Click on the Standard button, Select Raytraced, Click ok:
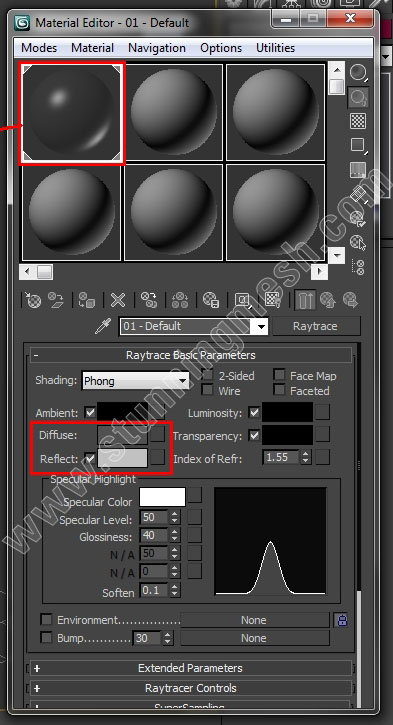
11. Change the following parameters to create metal chrome material. Drag and drop the material on the tube:
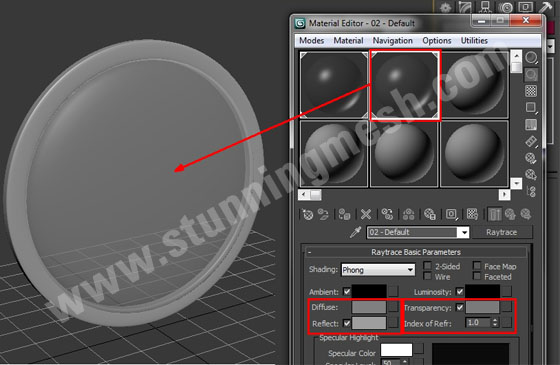
12. Create another raytraced material, change the following parameters for glass material. Drag and drop the glass material on the sphere:
13. Create standard material for home icon, change the following parameters. Drag and drop the material on the home icon:
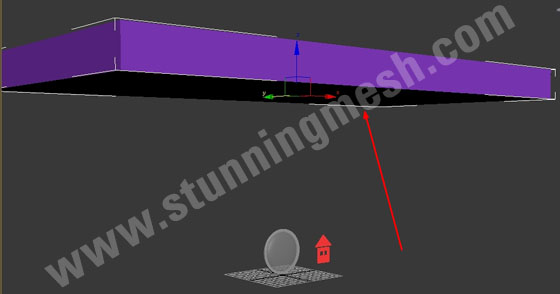
14. Create box on this position for reflection purpose:
15. Apply standard material on it. Change the following parameters. Drag and drop the material on the box:
16. Adjust home icon and sphere as shown below:
17. Go to standard lights:
18. Select omni lights:
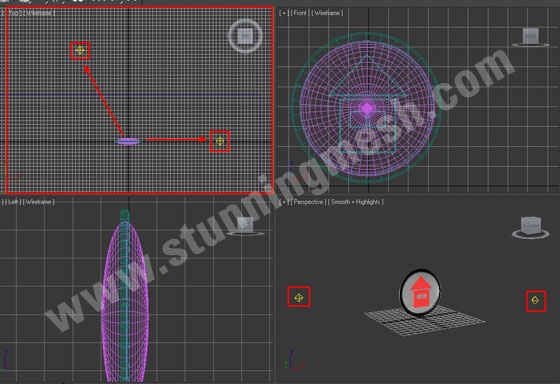
19. Create two omni lights on the following positions:
20. Press (F9) key to render the scene:
21. When rendering done, click on the save image button, save image as png format:
22. Here is the final image you will get and you’ll make PNG Transparent Icon in 3D Studio Max quiet Easily:










Very cool! I made a smiley, it looks funney!
its too hard but working. nice tricks