Today we are going to make a PlayStation Joystick in Photoshop. A lot of things for you to learn. We will be using different color-scheme instead of traditional color-scheme. It will be a long tutorial so be prepared mentally for that. So enjoy making it.
Here is the Final Result of PlayStation Joystick in Photoshop:
1. Lets start with new file in Photoshop, having size of 560×400 px, with RGB color mode and 72 DPI.
2. Now goto Layer Panel and click on Create a new Group icon and rename it “Left Part”, we will be making left side of Joystick in it:
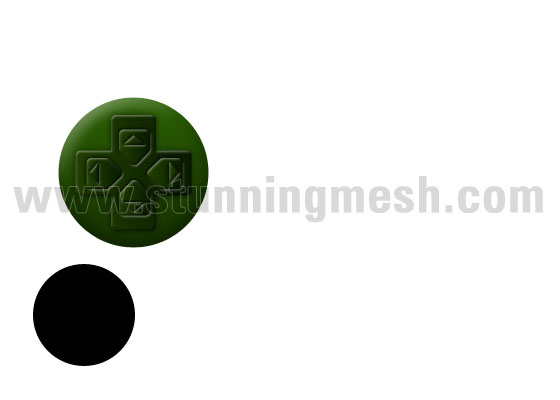
2. Now pick Ellipse Tool and draw a circle of size 150×150 px by holding Shift key, color don’t matter:
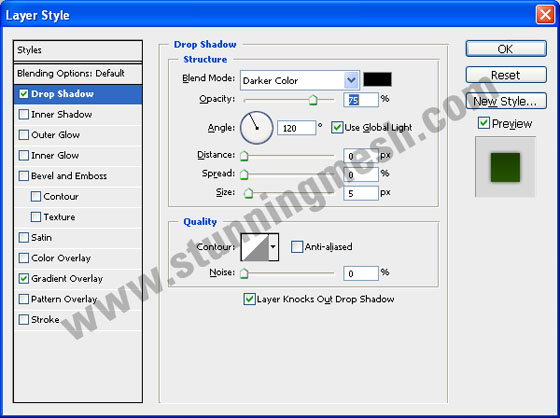
3. Run the command, Layer >> Layer Style >> Gradient Overlay and make the following gradient:
4. Again run the command, Layer >> Layer Style >> Bevel & Emboss and give the following settings:
you will get the following:
5. Now pick Rounded Rectangle Tool , give the radius to 5 px from the above property panel and draw a long rectangle as shown below:
6. Press Ctrl+J to duplicate it, then Press Ctrl+T to transform and rotate it to 90 degree, then select both rectangles and press Ctrl+E to merge both:
6. Give it the following properties:
cross would become like this:
7. By using Pen Tool , make the following shape over it:
8. Right click on the layer name of previously made Cross shape and select Copy Layer Style and then right click on newly created shape and select Paste layer style, you will get this:
9. Double click on the Bevel & Emboss layer style and change the style from Inner Bevel to Pillow Emboss:
you will get this:
10. Now duplicate this shape three times and place at the following position:
11. Right click on the name of any of these four shapes and select Copy Layer Styles and Now draw a small triangle over it:
12. Right click on its layer name and select Paste Layer Style, then press Ctrl+J 3 times to duplicate this shape and adjust them accordingly as shown below:
13. Now pick Ellipse tool again and draw a smaller circle below all objects layer, as shown below and then right click on its layer name and select Rasterize Layer:
14. Pick Pen tool and make the following shape:
15. Right click anywhere and select Make Selection, give 0 in Feather and then fill the selection by any color:
16. Give it the following layer Styles:
This kind of result should come:
17. All this work done so far would be inside the group Left Part, now right click over the name of Group in Layer Panel and select Duplicate Group, Rename it as Right part:
Then Remove the 4 directional Arrows and its base, but leave the Cross:
18. Press Ctrl+T (for transform), then right click over it and select Flip Horizontal. Move it towards the right side:
19. Now we will be doing some work while remaining in Right Part group. First we are going to add some Circles and applying same gradient as we applied over the Directional Arrows as:
20. Now we are going to make Triangle, Circle, Square and Cross over these buttons, you can use Custom Shape Tool to draw over it. Just give them different colors, reduce layer opacity to 75% and give them a simple drop shadow:
21. Create another Group, name it Circle1, and draw another Circle at the following position:
apply the following gradient:
you will get this:
22. Duplicate this circle, reduce the size and reverse the gradient, like:
then apply the following Layer Styles:
you will get this:
23. Now duplicate this group and move it towards right as:
24. Draw a small strip behind every object at the following location:
25. Apply the following Gradient and Bevel & Emboss:
26. Now take another Large rectangle behind every object and apply the same style as we applied for small strip as:
27. Now I’ve given some text and buttons over it, by copy/pasting existing styles, and will get:
28. After giving some detailing, we will be having Final result of our PlayStation Joystick in Photoshop:


its nice i learn more from it.
Wow! It’s cool…. nice tutorial…
thanks..!!
funny tut. Thanks very much.
Thank you Wijdan. That took a long time to do but I think it was well worth the effort, thanks for the tutorial and the inspiration!
I used your tutorial as more of a guideline. But I wanted to create a more photo-realistic PS3 controller. Here’s the end result:
http://www.chrisfergojr.com/images/photoshopart/PS3_controller.jpg
That is really impressive work done by you. Great job.
This is very beautiful tutorial. i’m learning very effective steps to make nice photos.
thanks for sharing.
Very nice and easy to learn step-by-step tutorial. Thanks for sharing your innovative post… 🙂
Best
Regards
image masking service
wow this hard im stuckat making the little triangle thingys on the d-pad a littele clarafacation would be appreciated