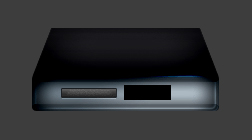
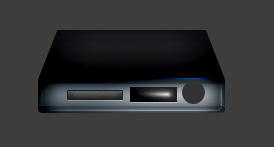
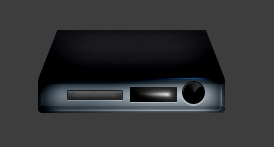
Today we are going to make a Stylish DVD Player in Photoshop. Very simple, nice and elegant DVD Player we are going to make in Photoshop. Some Basic Photoshop Tools involved while making this tutorial. For beginner it is nice tutorial to learn a lot. So lets start.
Step 1:
Let’s start out by creating a new file. I used a 400×400 pixels canvas set at 72dpi, and I filled my background with #3D3D3D color shade. Now select the Rounded Rectangle Tool and set the radius setting to 4 px on the Options bar. In a new layer, draw a long rounded rectangle with #505559 color shade and 187 x 36 px dimensions.
Step 2:
Under Layer Style (Layer > Layer Style) add an Inner Shadow, Inner Glow, Satin, and Gradient Overlay blending options to the long rounded rectangle layer.
Result:
Step 3:
In a new layer, draw a long white rounded rectangle with the same size as the grey rounded rectangle.
Step 4:
Under Layer Style (Layer > Layer Style) add an Inner Shadow, and Inner Glow blending options to your white rounded rectangle layer. Then set the layer’s blending mode to Darken.
Result:
Step 5:
Create a new layer, using the Pen Tool, create the top gray (#313133) shape of the DVD player.
Step 6:
Under Layer Style (Layer > Layer Style) add an Inner Shadow, Inner Glow, Satin, and Gradient Overlay blending options to the top slanted layer.
Result:
Step 7:
Create a new layer, then draw a small gray rectangle with #262626 color shade and 54 x 8 px dimensions.
Step 8:
Under Layer Style (Layer > Layer Style) add a Drop Shadow, Inner Shadow, Inner Glow, Gradient Overlay, and Stroke blending options to the small gray rectangle layer.
Result:
Step 9:
Create a new layer, then draw a small black rectangle with 47 x 15 px dimensions.
Step 10:
Under Layer Style (Layer > Layer Style) add a Drop Shadow, Inner Glow, and Gradient Overlay blending options to the black rectangle layer.
Result:
Step 11:
In a new layer, draw a gray circle with #333333 color shade and 23 x 23 px dimensions.
Step 12:
Under Layer Style (Layer > Layer Style) add a Drop Shadow, Inner Glow, Gradient Overlay, and Stroke blending options to the gray circle layer.
Result:
Step 13:
In a new layer, draw a white target line on the circle design. Then set the layer’s opacity level to 17%.
Step 14:
In separate text layers, add the Sony, DVD and timer texts on the DVD player. Use font Arial with white color for the texts and #00FFE4 color shade for the timer.
Step 15:
In a new layer, draw a small green circle with #00FF48 color shade and 4 x 4 px dimensions on the bottom corner of the DVD player.
Step 16:
Under Layer Style (Layer > Layer Style) add an Outer Glow blending option to small green circle layer.
Result:
Results:
So here is our Stylish DVD Player in Photoshop, we just made, hopefully you enjoyed making this tutorial.
Lets checkout our other Realistic iPad Design in Photoshop Tutorial.


Thanks for the tutorial. Very detailed.