In this Photoshop Tutorial we are going to make High Tech Chip Logo. It will be teaching you some techniques about Logo Designing. We will be using some Basic Photoshop Tools like Rounded Rectangle Tool, Rectangle Tool, Ellipse Tool, and Basic Photoshop Commands like Layer Styles etc. to make this logo. Very informative and useful logo design technique for you to learn. Lets start.
Step 1:
Let’s start out by creating a new file. I used a 600×400 pixels canvas set at 72dpi, and I filled my background with Black. Now make a new layer set and name it ‘Chip Design‘. Select the Rounded Rectangle Tool, set the radius setting to 8 px on the Options bar. In a new layer, draw a gray rounded rectangle with #757374 color shade and 111×100 px dimensions.
Step 2:
Under Layer Style (Layer > Layer Style) add an Inner Shadow, Inner Glow,Gradient Overlay, and Stroke blending options to the gray rounded rectangle layer.
Result:
Step 3:
In a new layer, draw a black rounded rectangle with 99 x 88 px dimensions.
Step 4:
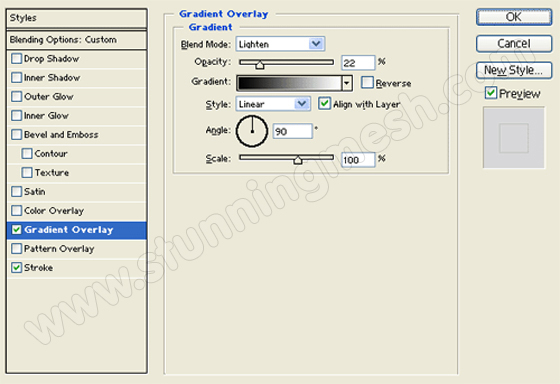
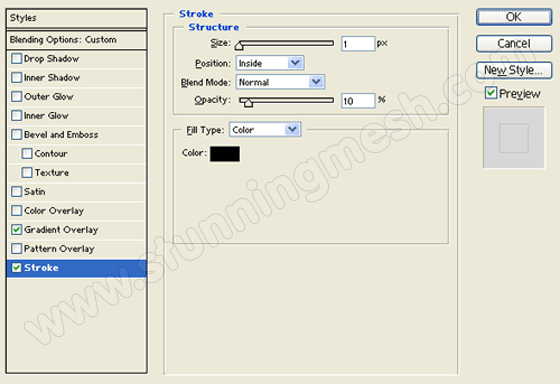
Under Layer Style (Layer > Layer Style) add a Gradient Overlay, and Stroke blending options to the black rounded rectangle layer. Then set the layer’s blending mode to Lighten.
Result:
Step 5:
Create a new layer set and name it ‘Rectangles‘. In a new layer, draw a small gray rectangle with #A6A6A6 colors shade and 22 x 9 px dimensions.
Step 6:
Under Layer Style (Layer > Layer Style) add a Drop Shadow, Inner Shadow, Inner Glow, and Gradient Overlay blending options to the small gray rectangle layer.
Result:
Step 7:
Duplicate the small gray rectangle layer design six times and place them as shown below.
Now merge down the ‘Rectangles‘ layer set through Layer > Merge Layer Set so it transforms into a regular layer. Then apply a Sharpen Filter to the gray rectangles design layer through Filter > Sharpen > Sharpen More.
Step 8:
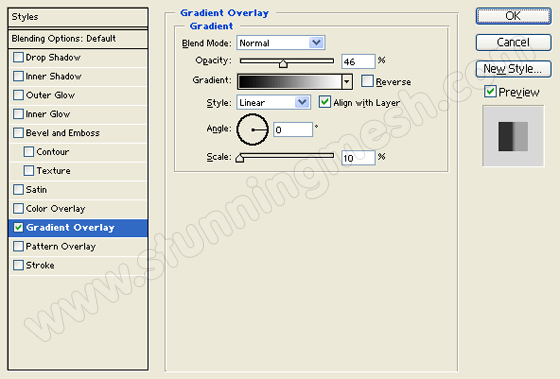
Under Layer Style (Layer > Layer Style) add a Gradient Overlay blending option to the small rectangles design layer.
Result:
Step 9:
Create a new layer and merge it with the small rectangles design layer. Now place the small rectangles design layer inside the ‘Chip Design‘ layer set. Then add the small rectangles design on each side of the rounded rectangle design.
Step 10:
Merge down your ‘Chip Design‘ layer set. Then under Layer Style (Layer > Layer Style) add an Inner Shadow, and Inner Glow blending options to the Chip Design layer.
Result:
Step 11:
In a new layer, draw a small gray circle with #6D6C6D color shade.
Step 12:
Under Layer Style (Layer > Layer Style) add a Gradient Overlay blending option to the small gray circle layer.
Result:
Step 13:
Select the Horizontal Type Tool, then set the font family to Arial, smooth and white color shade. In a new text layer, type out text details on the chip design.
Step 14:
In a new text layer, type out your name using font Arial, bold italic, 90 pt, smooth and White color.
Step 15:
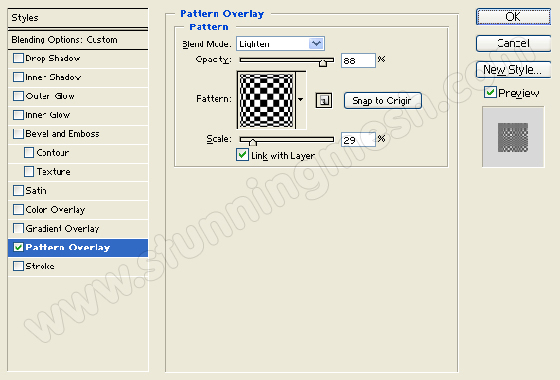
Under Layer Style (Layer > Layer Style) add a Pattern Overlay blending option to your name text layer. Then set the text layer’s blending mode to Darken.
Result:
Step 16:
In another text layer, type out your name with #949494 color shade. Position it with the other text design as shown below.
Step 17:
Under Layer Style (Layer > Layer Style) add a Drop Shadow, Inner Shadow, Inner Glow, Satin, and Gradient Overlay blending option to your gray text layer.
Result:
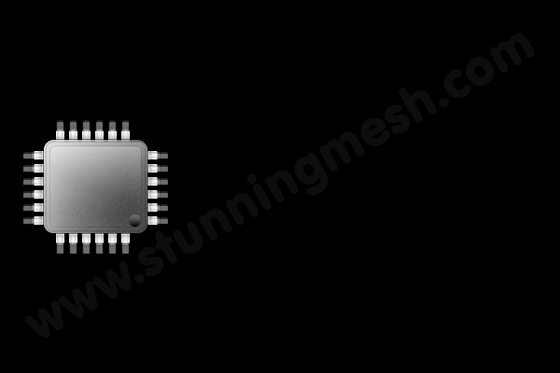
Final Result:
So here is our Final High Tech Chip Logo Design we just made in Photoshop. Hope you have learn a lot from this tutorial.
You’ll surly love visiting our Toolbox Design Tutorial in Photoshop.










Nice Tutorials. Thanks for sharing…
Good Staff, thank you for sharing!
Thank you for the tutorial, 🙂