In today’s Photoshop Tutorial we are going to learn Stylish Pencil Design in Photoshop. In this tutorial we will use some basic Tools like Pen Tool, Rectangular Marquee Selection Tool, Rectangle Tool etc. We will also learn some Layer Styles like Inner Shadow, Drop Shadow, Bevel and Emboss, Satin, Inner Glow etc. So it will really helpful for those who wanted to learn Photoshop and wanted to learn how to make objects in Photoshop. So lets start.
Here is what we are going to design in Photoshop.

Step 1:
Let’s start out by creating a new file. I used a 560×350 pixels canvas set at 72dpi, and I filled my background with #626262 color shade. Now create a New Layer set and name it ‘Pencil‘. In a new layer, draw a horizontal rounded rectangle with #F6B829 color shade and 490 x 39 px dimensions. Add a Marquee Selection around the horizontal rounded rectangle through Select > Load Selection, use default settings, then create a new layer and cover the right end of the rounded rectangle with a dark gray (i.e. #2C2C2C) color shade using the Rectangle Tool ![]() . In another new layer, add a thin light gray (i.e. #DDDBDB) rectangle with 10px x 39px dimensions next to the dark gray shape as shown below. Cut the left end of the long horizontal rounded rectangle so the end is straight.
. In another new layer, add a thin light gray (i.e. #DDDBDB) rectangle with 10px x 39px dimensions next to the dark gray shape as shown below. Cut the left end of the long horizontal rounded rectangle so the end is straight.

Step 2:
Under Layer Style (Layer > Layer Style) add an Inner Shadow and Gradient Overlay blending options to the pencil shape layer, give the following settings.

After hitting OK you will get this::

Step 3:
Create a new layer. Using the Pen Tool ![]() , draw the triangle shape with #D1B387 color shade on the pencil design.
, draw the triangle shape with #D1B387 color shade on the pencil design.

Step 4:
Under Layer Style (Layer > Layer Style) add an Inner Shadow and Gradient Overlay blending options to the triangle shape layer, give the following settings:

After hitting OK, you will get this:

Step 5:
In a new layer, draw the small dark gray (i.e. #575757) triangle shape for the lead of the pencil.

Step 6:
Under Layer Style (Layer > Layer Style) add an Inner Glow and Bevel and Emboss blending options to the lead shape layer, give the following settings.
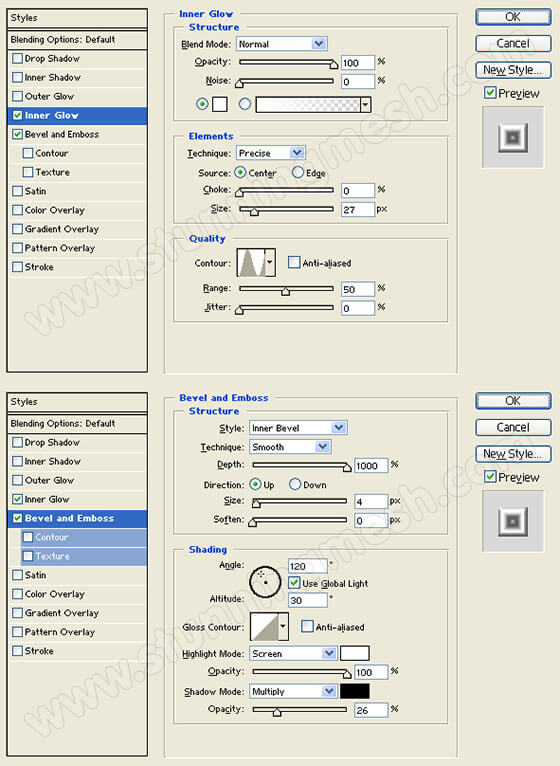
After hitting OK, you will get this:

Step 7:
Highlight the ‘Pencil’ layer set on the Layers Window, then go to Layer > Merge Layer Set. The layer set should turn into a regular layer. Now under Layer Style (Layer > Layer Style) add an Inner Shadow and Satin blending options to the Pencil layer, give the following settings:

After hitting OK, you will get this:

Step 8:
In a new layer add a shadow below the pencil as shown below.
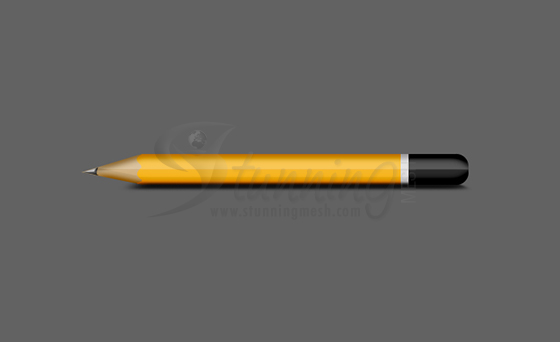
Final Results:
So after giving some final touching here we have our Stylish Pencil Design in Photoshop.
You can also check out our two more Tutorials like this:


nice post….very helpful step by step tutorial for beginner