This Photoshop Text Effect Tutorials will teach you how to give Iron Man Text Effect in Photoshop. We will be using different Photoshop Tools, like Horizontal Type Tool, Ellipse Tool, Line Tool, Rectangular Marquee Selection Tool, Eraser Tool etc. We will also be using different Photoshop Commands like Layer Styles which will be having Drop Shadow, Inner Shadow, Stroke, Gradient Overlay, Color Overlay, Pattern Overlay etc. So a lot of things to learn from this tutorial so must try and send us your work after making by yourself.
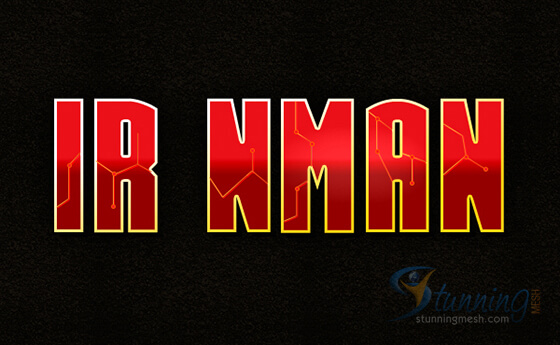
Here is what we are going to make in this Photoshop Tutorial:
Step 1: New File:
Start out by creating a new file. Use the following settings;
- Dimensions: 1000 x 600 px,
- Resolution: 72dpi,
- Color Mode: RGB color,
- Background: BLACK
Step 2: Layer Set:
Create a new layer set and name it, “IronMan Text“.
Step 3: Horizontal Type Tool:
Select the Horizontal Type Tool On the Options Window, set the font family to “CGF Arch reactor“, 160 pt, crisp and #EB0F17 color shade. Create a new text layer inside the Layer Set, then type your name. For this tutorial, I choose “IRONMAN” for the text so I can include the steps for creating the Arc Reactor (O Letter) design.
Step 4:
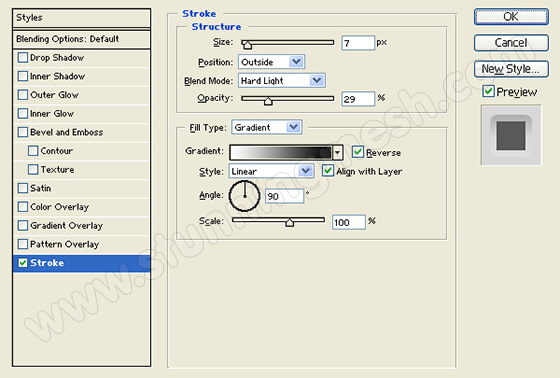
Add an Outer Glow, Inner Glow, Gradient Overlay, and Stroke styles to your text layer.
Layer Styles Preview:
Step 5:
Select the Line Tool On the Options Window, activate FILL Pixels, set the weight to 1 px and check anti-aliased. In a new layer, draw a random orange line with #D84F18 color shade as shown below.
Step 6:
Add a Drop Shadow and Gradient Overlay styles to your orange line layer.
Layer Styles Preview:
Step 7:
Add more orange lines in separate layers on the name, as shown below. Add the same layer styles settings from the first line design.
Step 8:
In a new text layer, type your text in black again on the same position as the first. Then add an Inner Shadow, Color Overlay, Gradient Overlay, and Pattern Overlay styles to your second black text layer. Now draw a small circle by using Ellipse Tool and give it #F8171F color.
Step 9:
Add a Stroke style to small red circle layer.
Layer Styles Preview:
Step 10:
Add a bunch of red circle designs on the lines, as shown below.
Step 11:
In a new layer, draw a red circle with #F8171F color shade and 87 x 87 px dimensions.
Step 12:
Add an Outer Glow, Inner Glow, Gradient Overlay, and Stroke styles to the red circle layer.
Layer Styles Preview:
Step 13:
Create a new layer. Then, draw a white circle with 41 x 41 px dimensions on the center of the red circle design.
Step 14:
Add a Stroke style to the white circle layer.
Layer Styles Preview:
Step 15:
Highlight the Iron Man Text layer set in the Layers Window. Then, merge the layer set through Layer > Merge Layer Set. The layer set should transform into a regular layer with the text design.
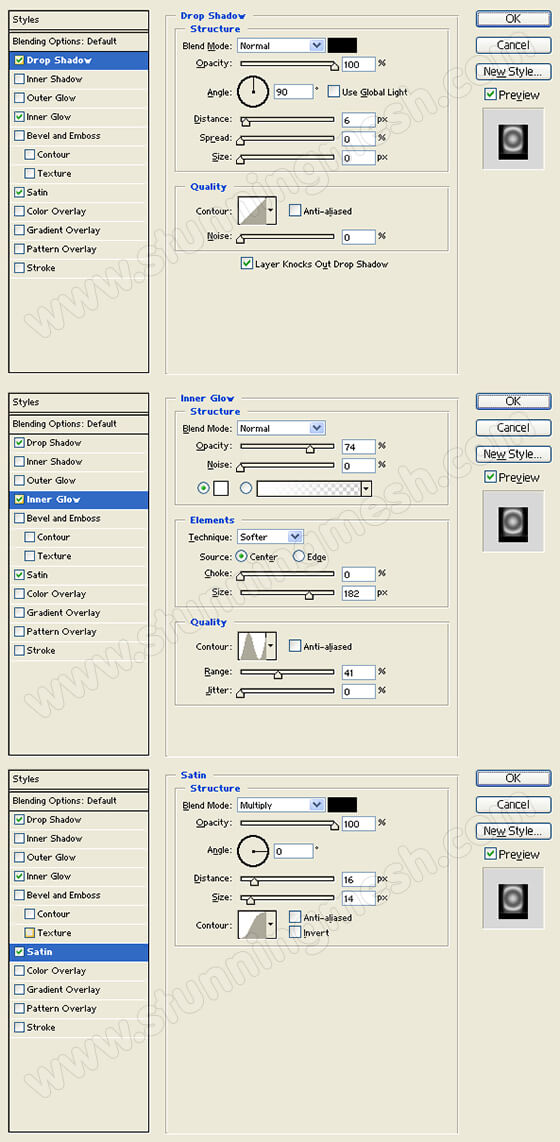
Now add a Drop Shadow, Inner Glow, and Satin styles to your Iron Man Text design layer.
Layer Styles Preview:
Step 16:
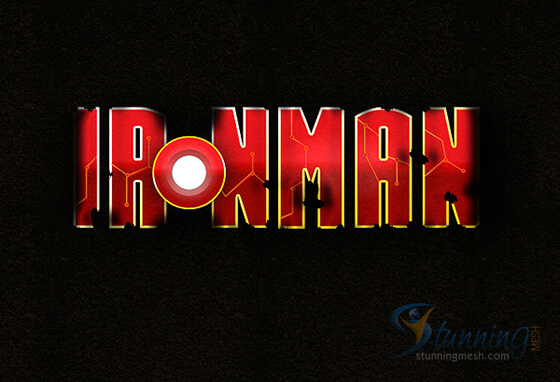
Use the Eraser Tool with a grudge style brush and do some erasing on the text for a beat up look.
Final Result:
Here is the final result of our Iron Man Text Effect in Photoshop, hope you enjoyed and like this style:
Hope you enjoyed working on this Tutorial, You may also like working on our Mint Gum design in Photoshop.


