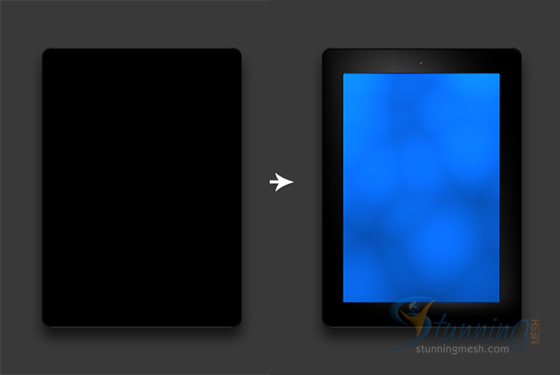
This is very long but important Photoshop Tutorial, in this Tutorial we will be making iPad which should give a realistic effect. As usual the purpose is to let you know the use of some Photoshop Tools (like Paint Bucket Tool, Rectangle Tool, Rounded Rectangle Tool, Ellipse Tool etc.) and Commands (like Drop Shadow, Inner Shadow, Inner Glow, Bevel and Emboss, Stroke, Gradient Overlay, Pattern Overlay, and Satin), alongwith some Techniques. So hopefully you will enjoy working on this Photoshop Tutorial, so without wasting more time lets start working on Realistic iPad Design in Photoshop.
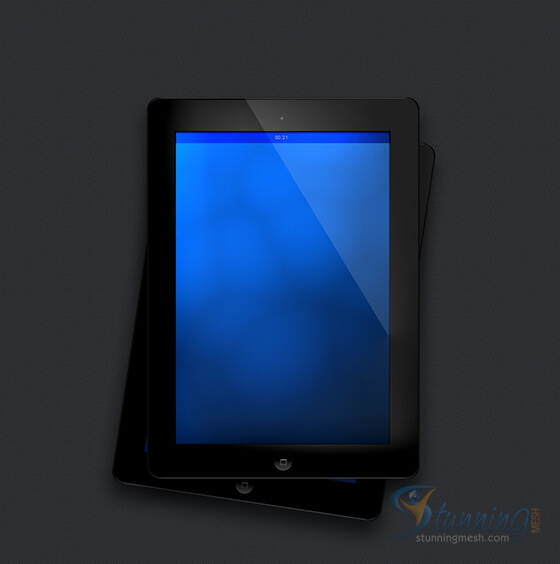
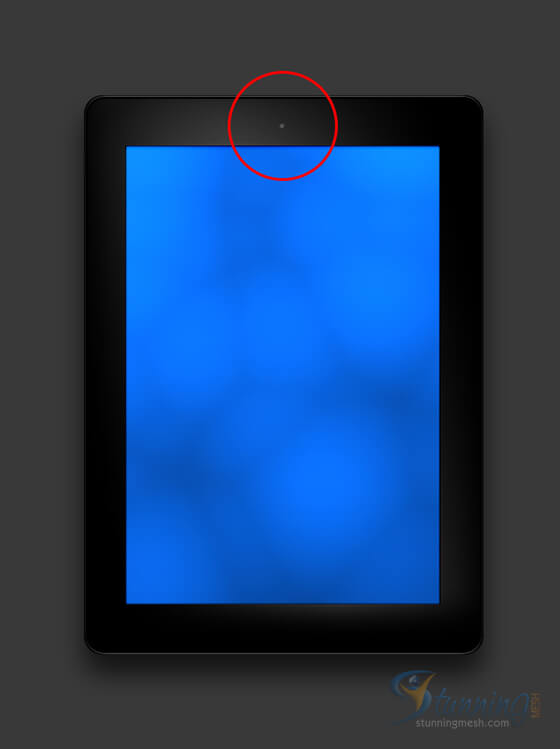
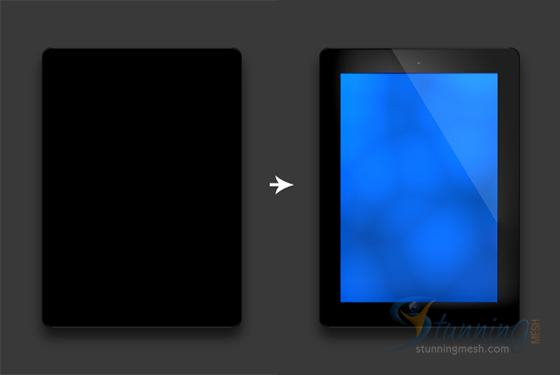
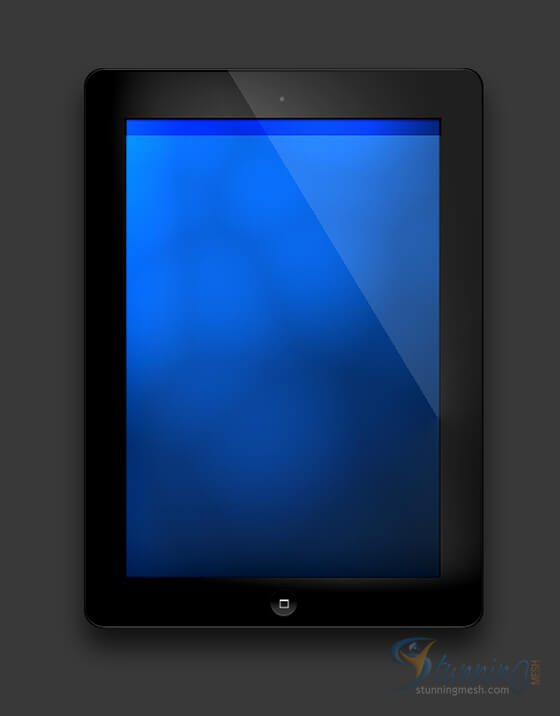
Final Preview:
This is the final Preview of our iPad Design in Photoshop:
Step 1: New File
Start out by creating a new file. Use the following settings:
- Dimensions: 1000×900 px
- Resolution: 72dpi
- Color Mode: RGB color

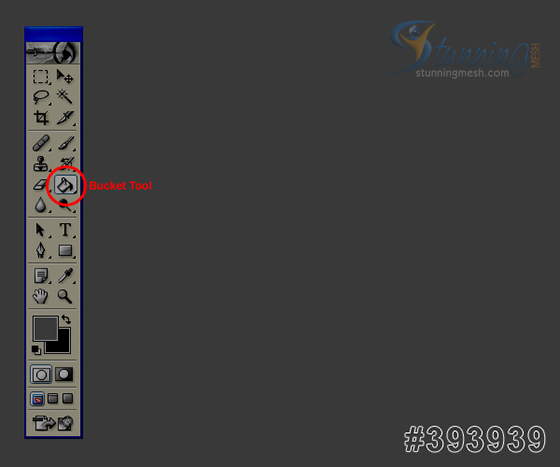
Step 2: Background
With the Paint Bucket Tool fill the document with #393939 color shade.
Step 3: Layer Set & Layers
Create a new layer set, and name it iPad (Layer > New > New Layer Set). Then, create a new layer inside the iPad layer set.
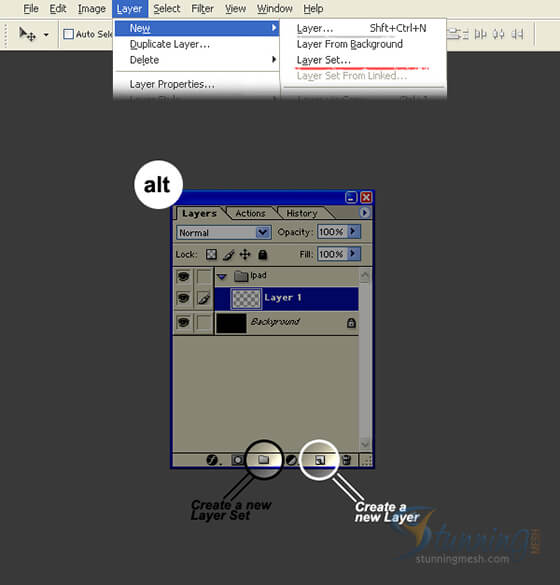
From now on, create your new layers and designs inside the iPad layer.
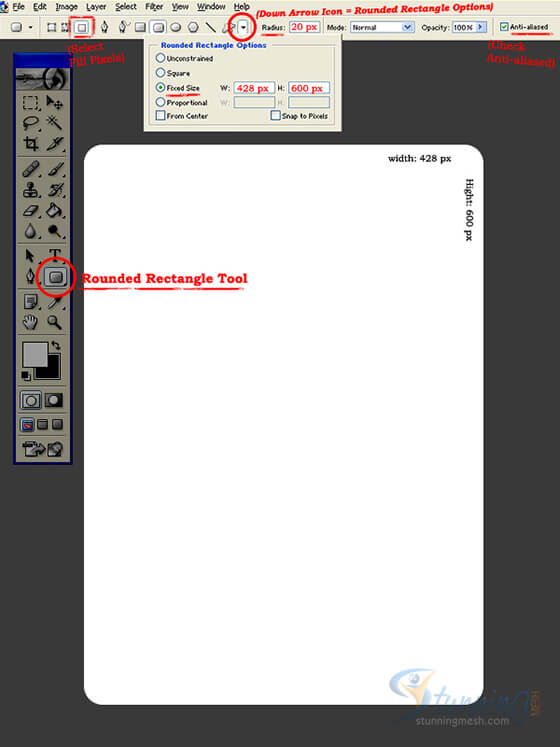
Step 4:
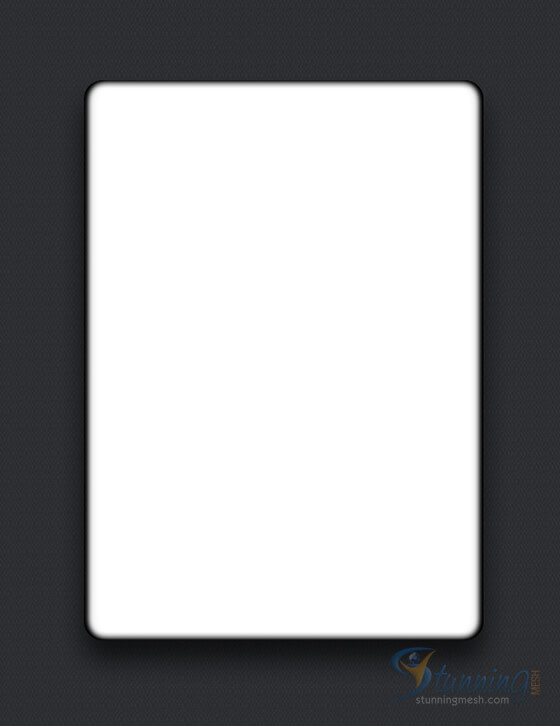
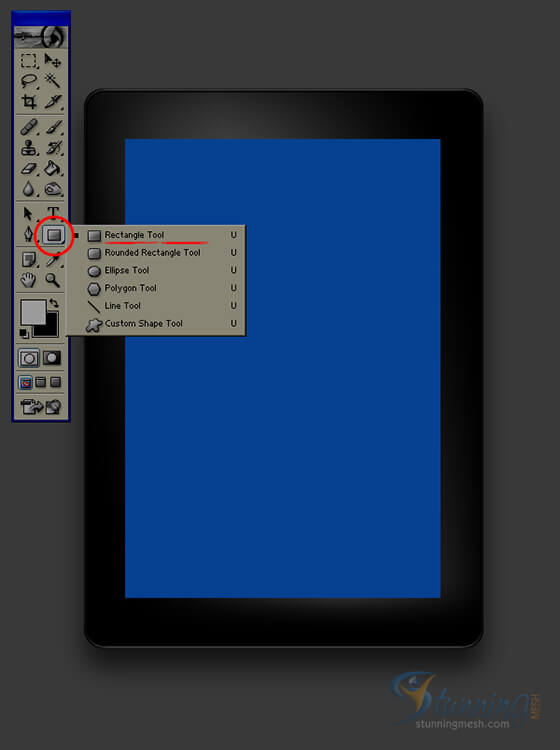
Select the Rounded Rectangle Tool. In the Options bar, Select “Fill Pixels“, set the Radius setting to 20 px, and check anti-aliased. In a new layer, draw a large white rounded rectangle with 428×600 px dimensions. Open the Rounded Rectangle Options and add the dimensions in the Fixed Size option to create the exact shape.
Step 5:
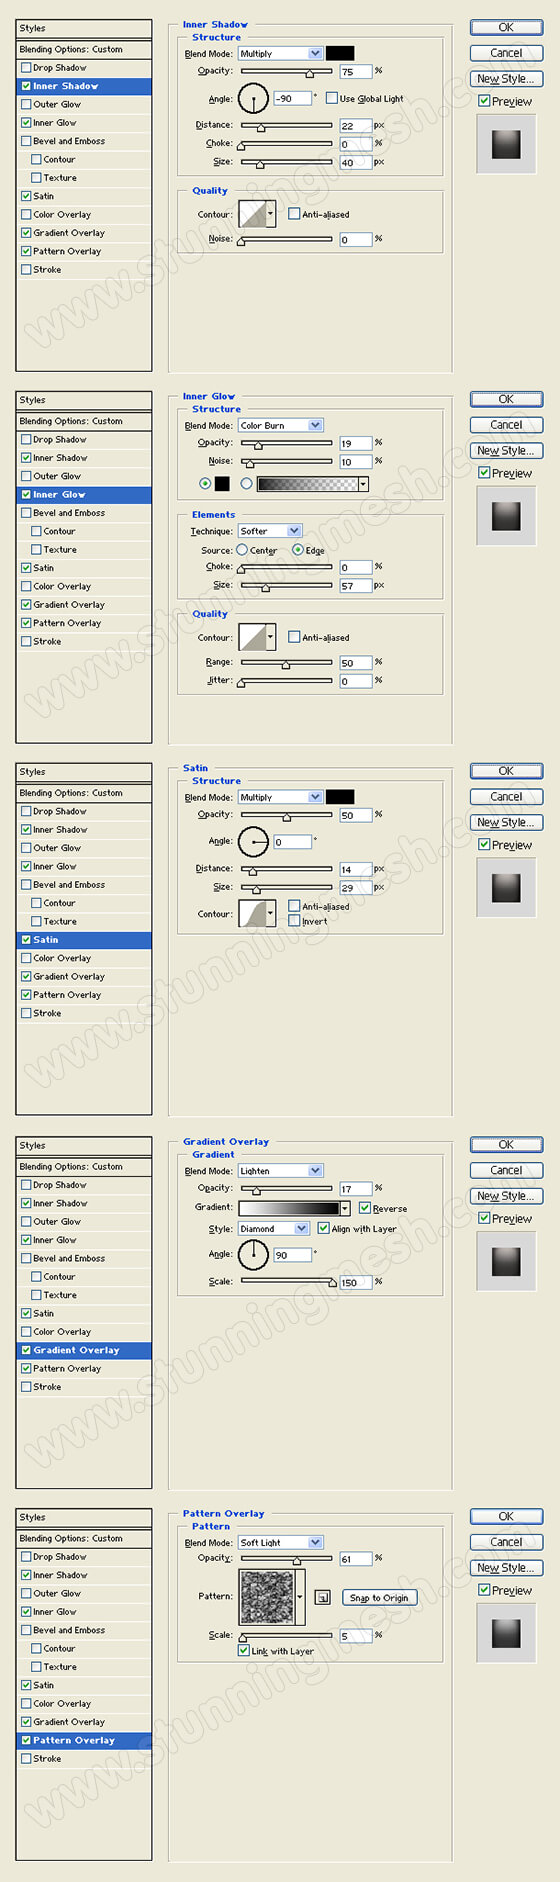
Add a Drop Shadow, Inner Glow, and Satin styles to the large white rounded rectangle layer. Use the settings provided on the step image below.
Layer Styles Preview:
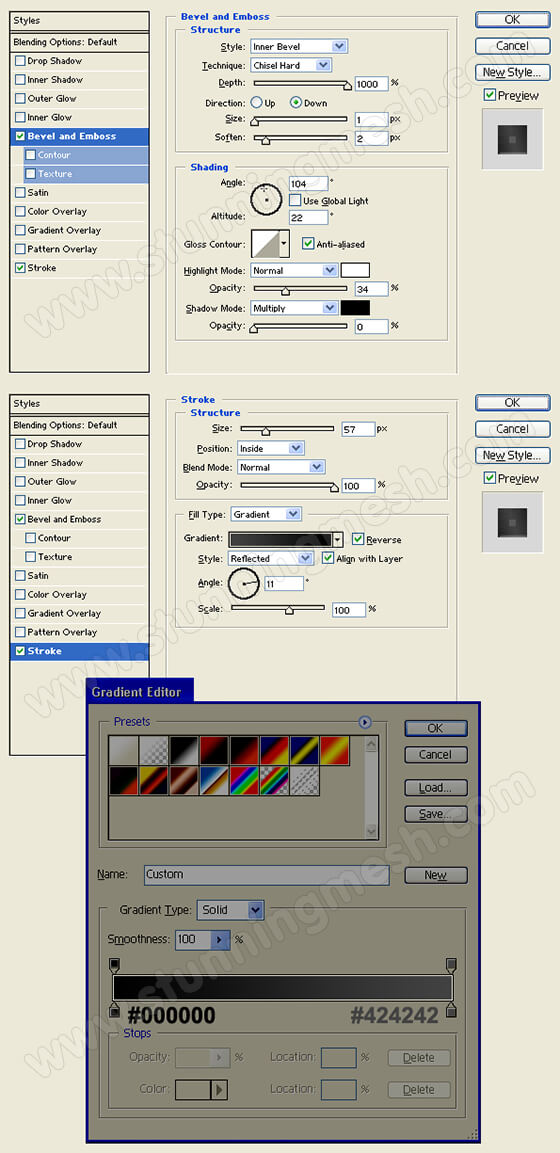
Step 6:
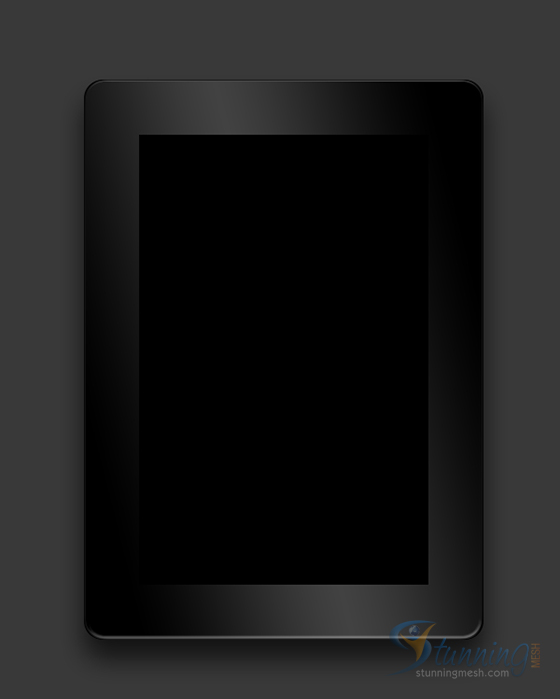
In a new layer layer, draw a large black rounded rectangle with 424 x 596 px dimensions.

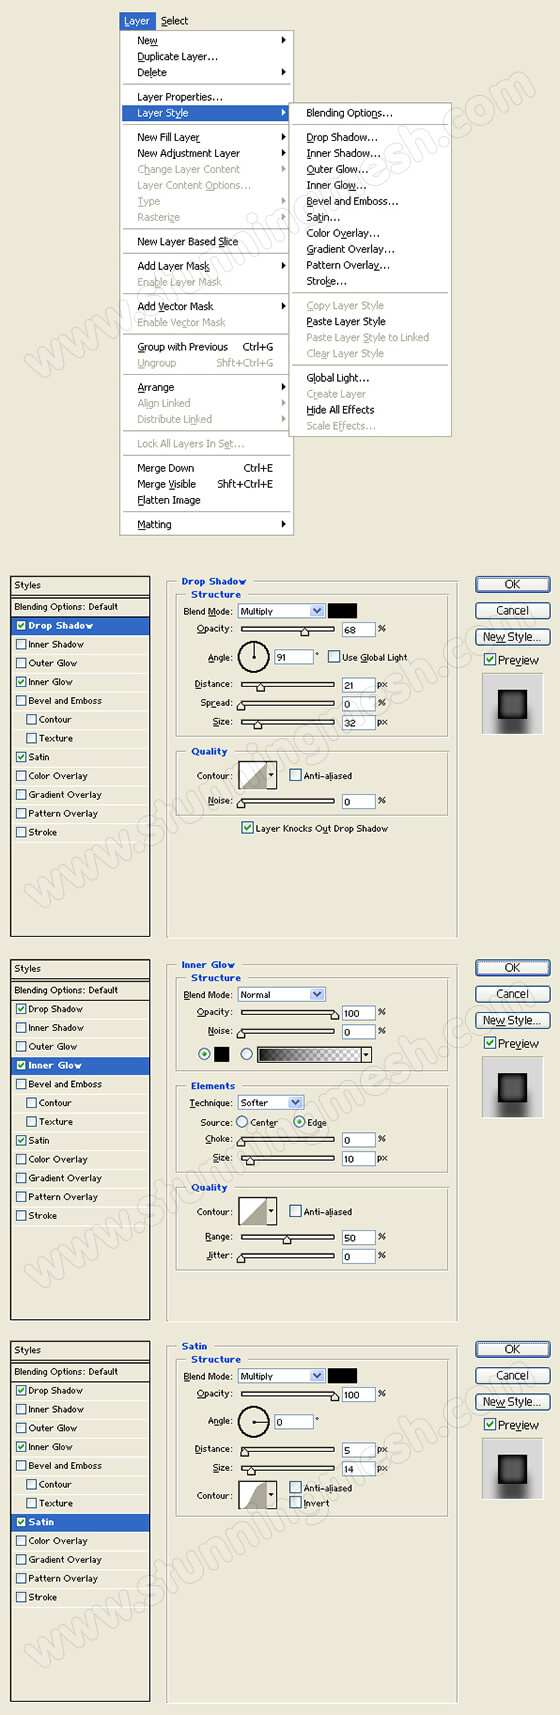
Step 7:
Add a Bevel and Emboss and Stroke styles to the large black rounded rectangle layer. Use the settings provided on the step image below.
Layer Style Preview:
Step 8:
In a new layer, draw another large black rounded rectangle with 424 x 596 px dimensions. Then, on the Layers Window, set the layer’s blending mode to Lighten. The black rounded rectangle should disappear.
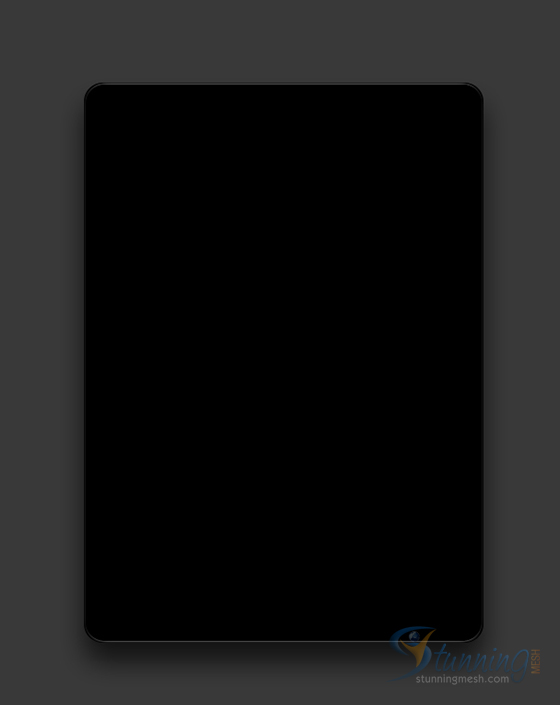
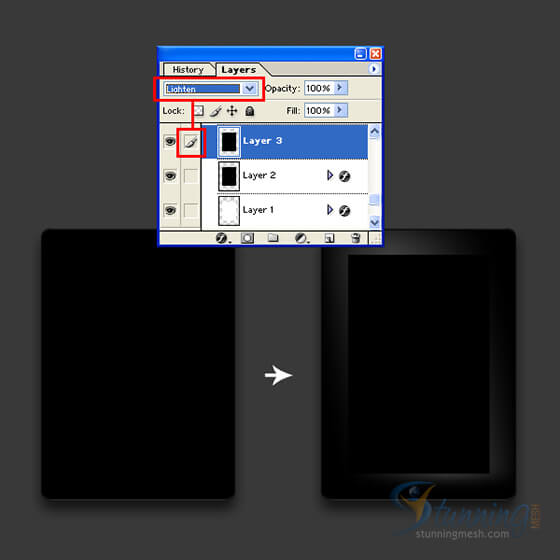
Step 9:
Add an Inner Shadow, Inner Glow, and Stroke styles to the second large black rounded rectangle layer. Use the settings provided on the step image below.
Layer Style Preview:
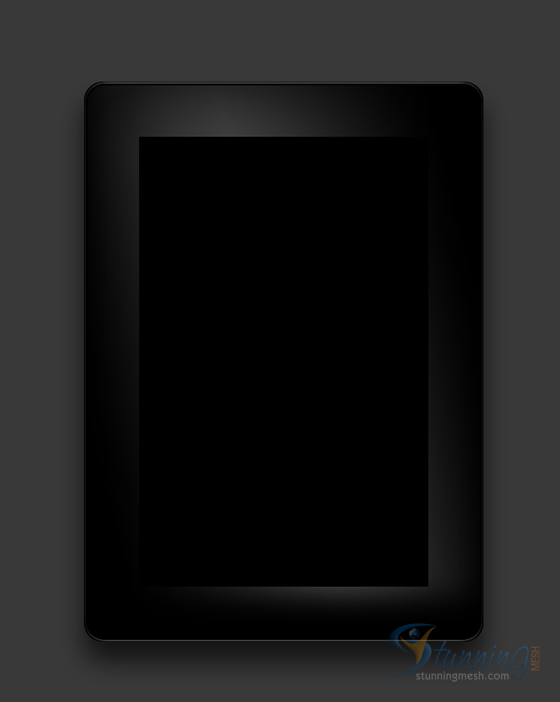
Step 10: Screen Display
Select the Rectangle Tool. In a new layer, draw a large rectangle with #064191 color shade and 338×492 px dimensions. Open the Rectangle Options on the Options Bar and add the dimensions in the Fixed Size option to create the exact shape.
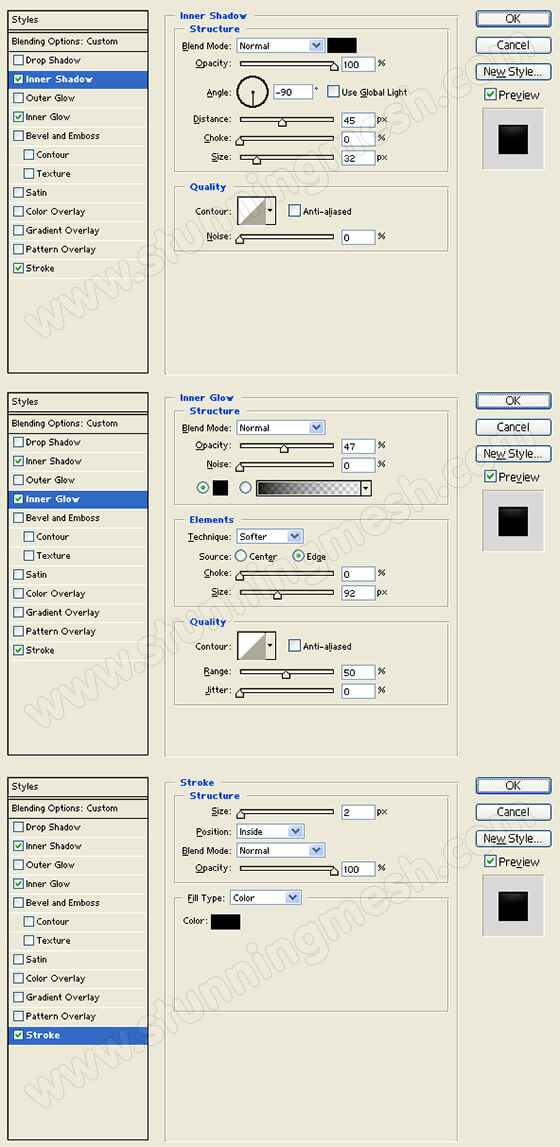
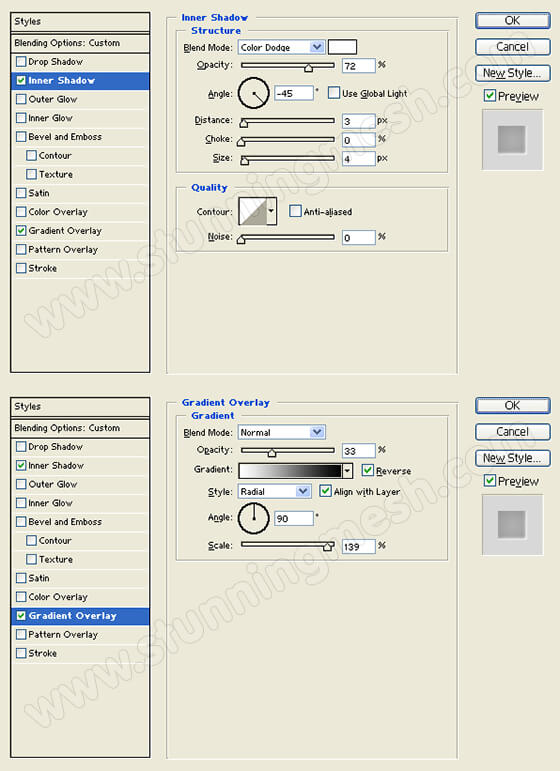
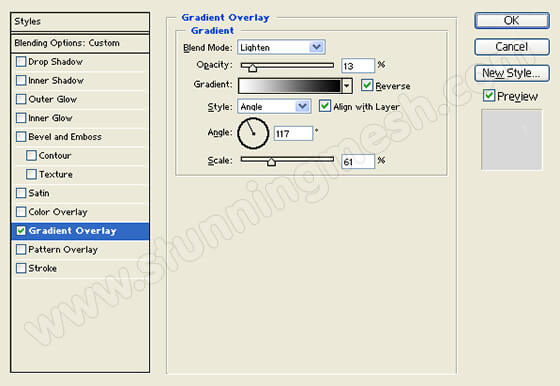
Step 11:
Add an Inner Shadow, Inner Glow, Satin, Gradient Overlay, and Pattern Overlay styles to the screen display layer. Use the settings provided on the step image below.

Layer Style Preview:
Step 12:
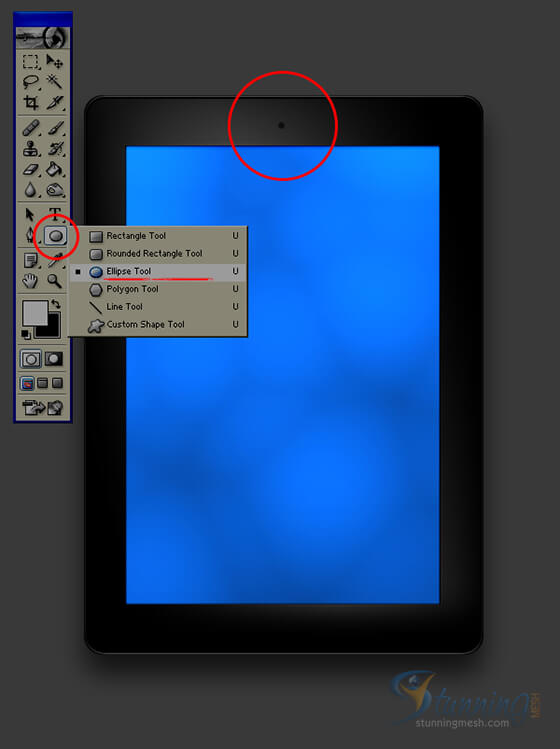
Create a new layer. Draw a small dark circle with #0E0E0E color shade using the Ellipse Tool on top of the screen display.
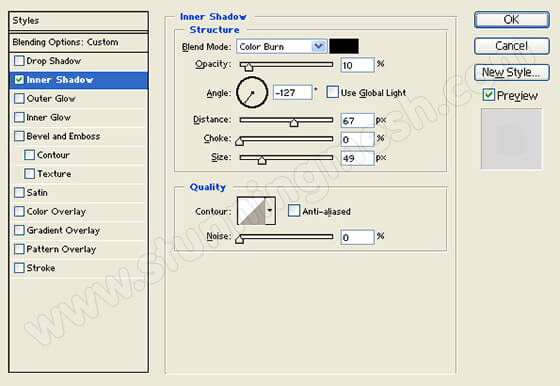
Step 13:
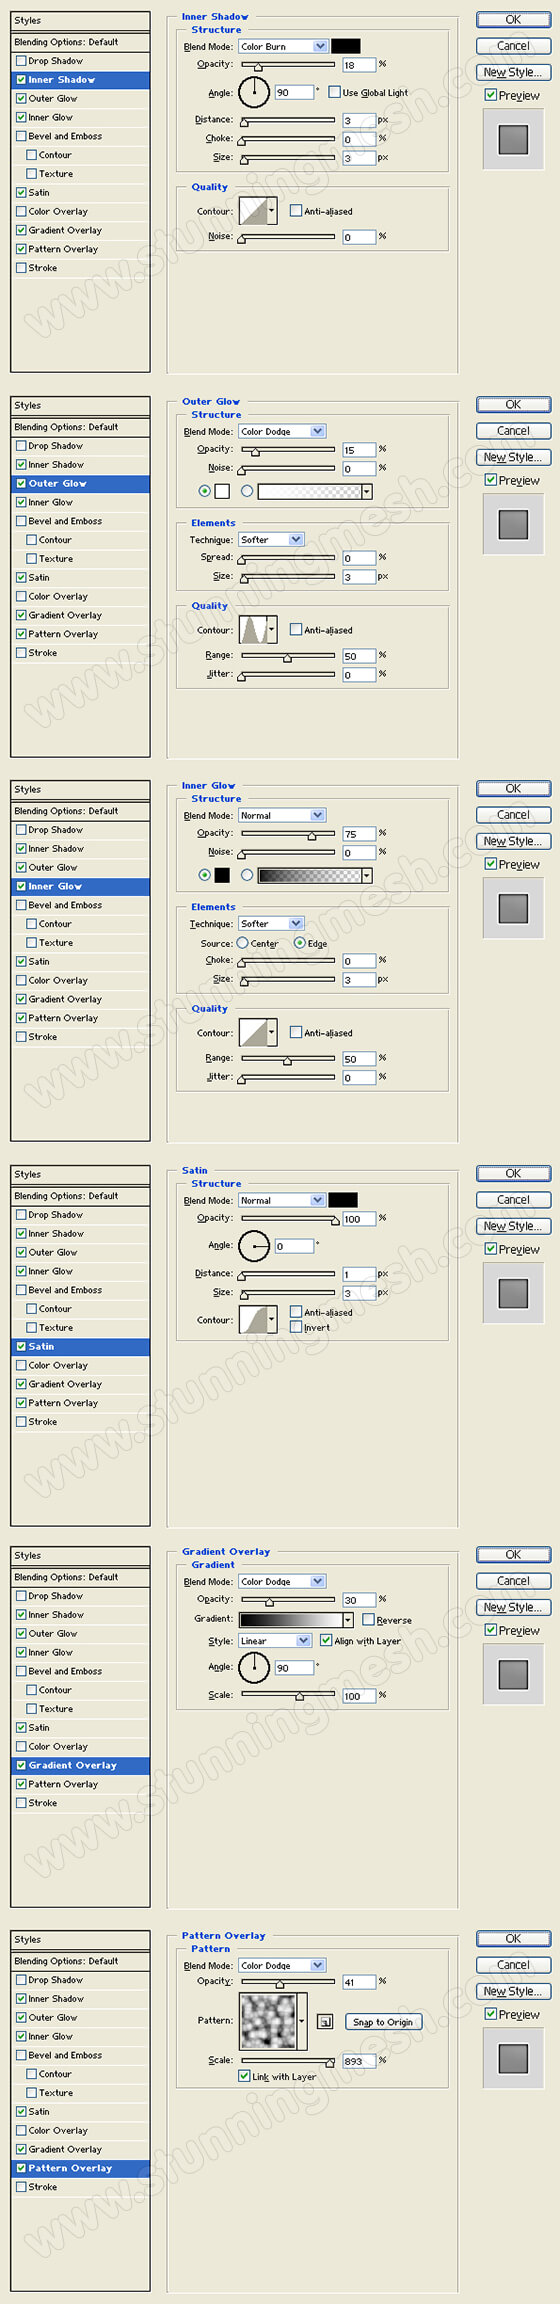
Add an Inner Shadow and Gradient Overlay styles to the small dark circle layer. Use the settings provided on the step image below.
Layer Style Preview:
Step 14:
In a new layer, add another large black rounded rectangle to the iPad design. Then, on the Layers Window, set the layer’s blending mode to Lighten. The large black rounded rectangle should disappear.
Step 15:
Add a Gradient Overlay styles to the third large black rounded rectangle layer. Use the settings provided on the step image below.
Layer Style Preview:
Step 16:
Once again, in a new layer, add another large black rounded rectangle to the iPad design. Then, on the Layers Window, set the layer’s blending mode to Lighten. The large black rounded rectangle should disappear.
Step 17:
Add an Inner Shadow style to the fourth large black rounded rectangle layer. Use the settings provided on the step image below.
Layer Style Preview:
Step 18:
Create a new layer. Using the Ellipse Tool, draw a gray circle with #4F4F4F color shade below the screen display.
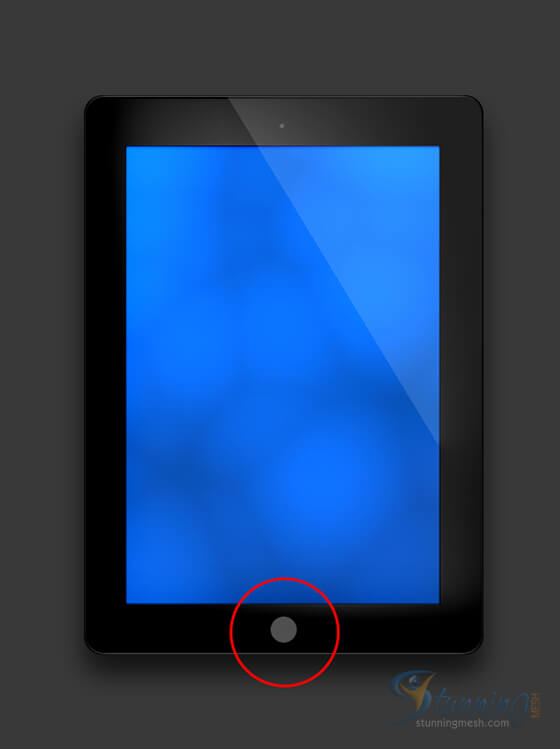
Step 19:
Add an Inner Shadow, Gradient Overlay, and Stroke styles to the gray circle layer. Use the settings provided on the step image below.
Layer Style Preview:
Step 20:
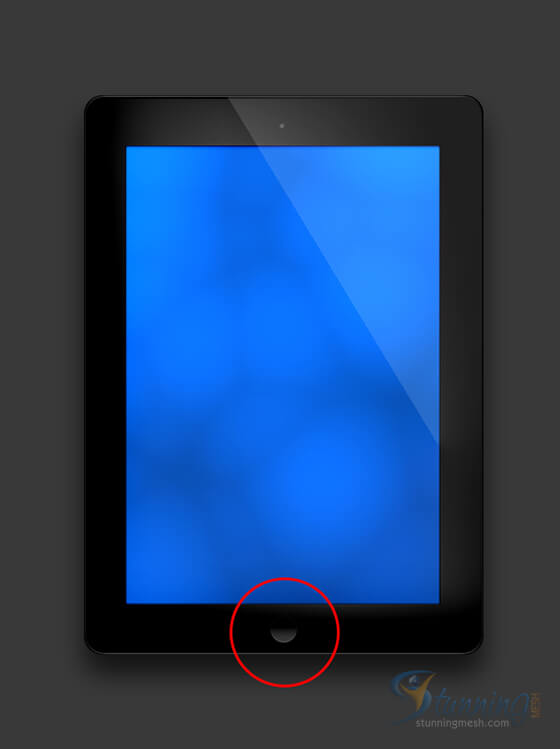
In a new layer, draw an outlined white box on the circle design. Then, in another new layer, draw a horizontal black rectangle with 314 x 19 px dimensions on top of the screen display.
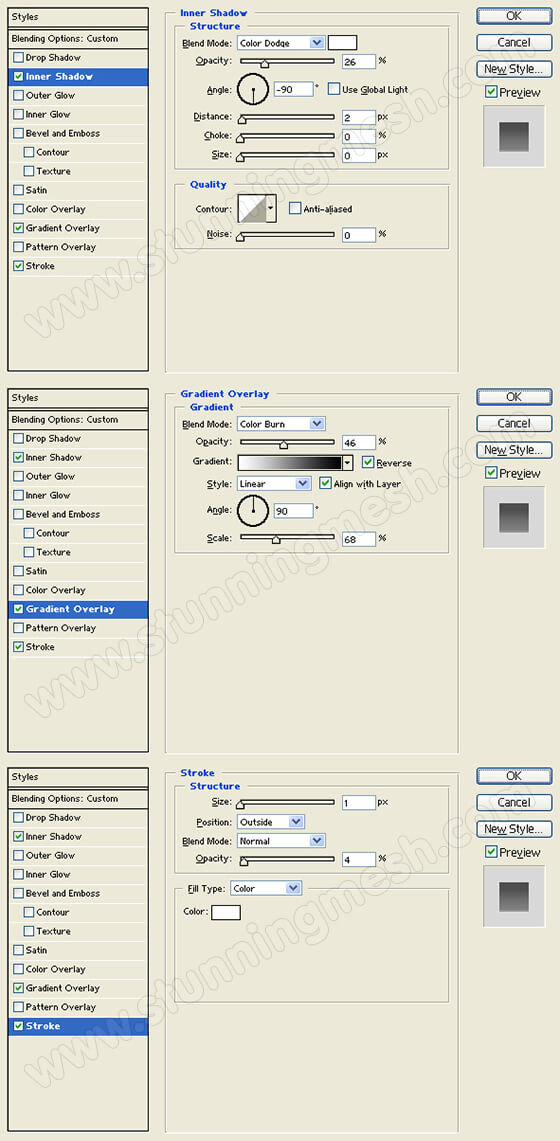
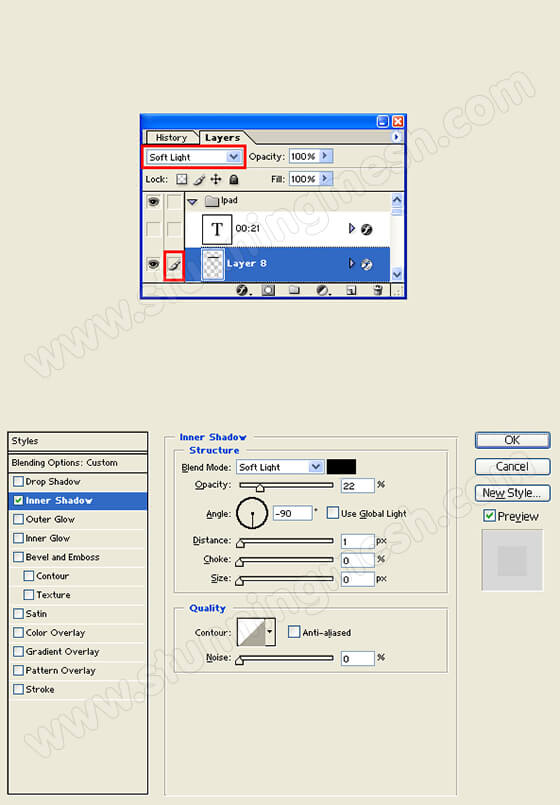
Step 21:
Add an Inner Shadow style to the horizontal black rectangle layer. Use the settings provided on the step image below. Then, set the layer’s blending mode to Soft Light in the Layers Window.
Layer Style Preview:
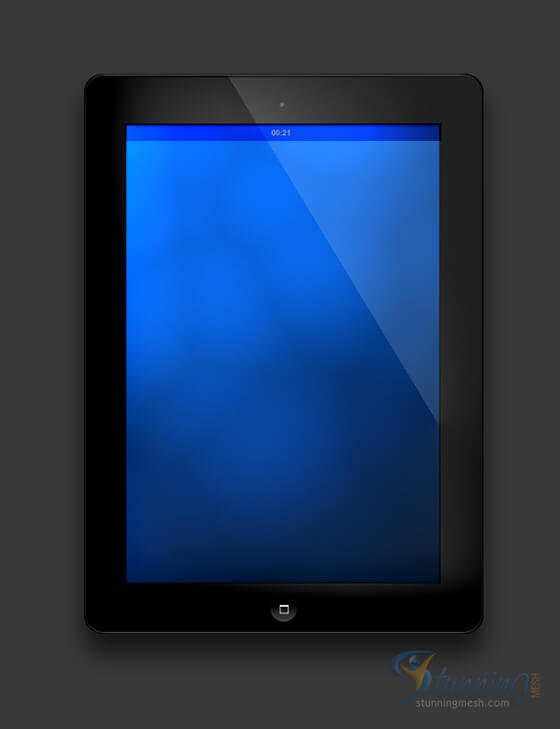
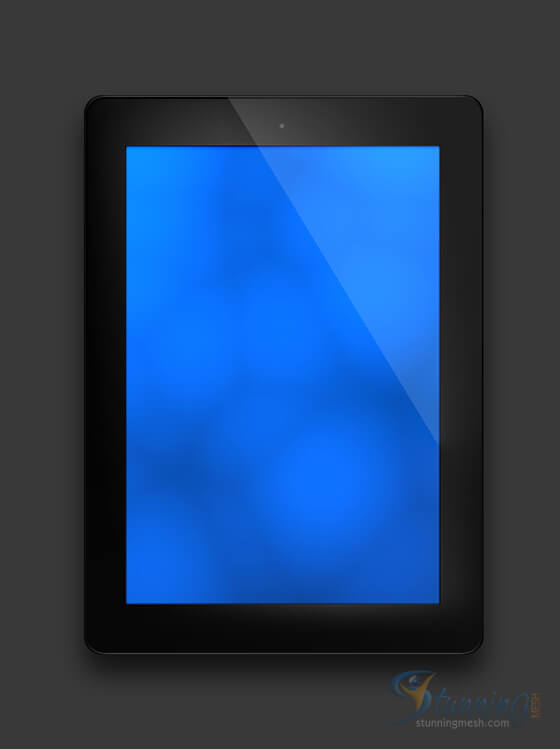
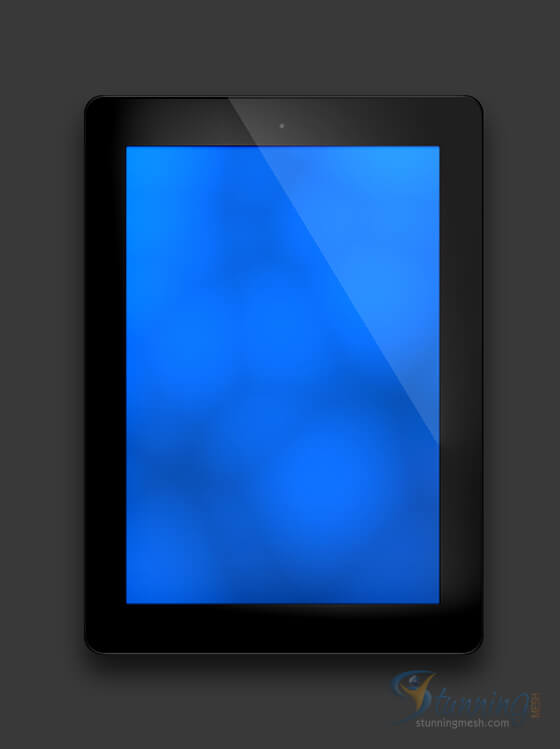
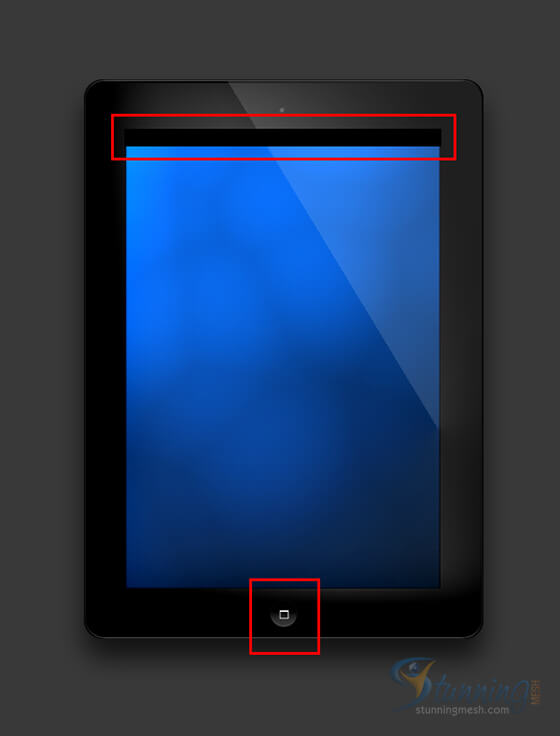
Final Image:
After spending some time, here is the Final result of our Realistic iPad Design in Photoshop:
Don’t forget to check our Luggage Design Tutorial in Photoshop.

![Luggage Design in Photoshop – [Photoshop Tutorial]](https://www.stunningmesh.com/wp-content/uploads/luggage-design-in-photoshop-final-result-100x100.jpg)