Here is another useful and important Photoshop Tutorial for you, in today’s Photoshop Tutorial, we are going to work on Orange Header Design in Photoshop. This header will be used in making a Template in Photoshop. By following this Tutorial you will learn how to design Navigation Bar in Photoshop. This is very simple but attractive Header Design in Photoshop. So without wasting more time, we are going to start our Tutorial.
Here is the Final Preview of what we are going to make in Photoshop:
Step 1:
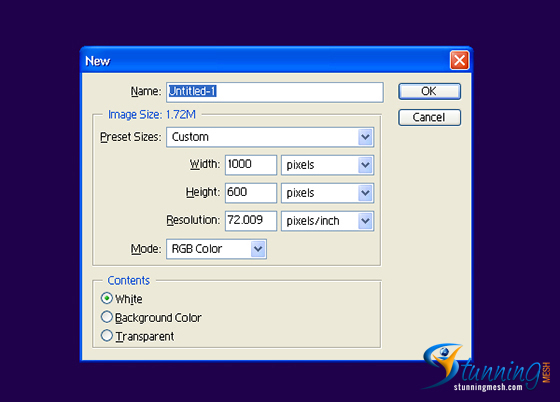
Let’s start out by creating a new file. I used a 1000×600 pixels canvas set at 72dpi, and I filled my background with #1F004B color shade using the Paint Bucket Tool.
Step 2:
In a new layer, draw a horizontal orange rectangle with #FF6C00 color shade and 657×45 px dimensions. If you want a longer navigation change the width.
Step 3:
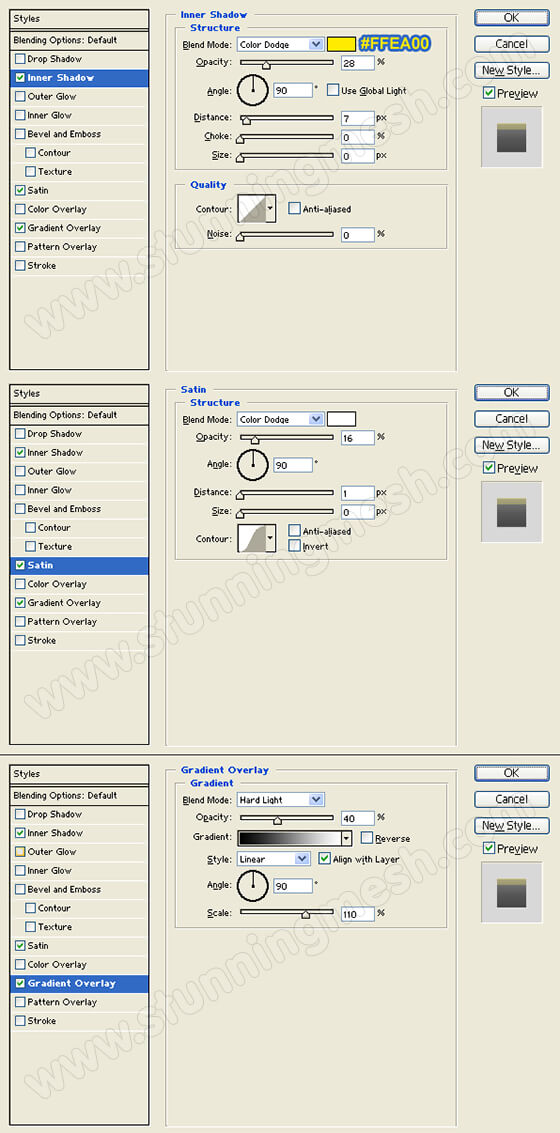
Apply an Inner Shadow, Satin, and Gradient Overlay layer styles to the horizontal orange rectangle layer.
Layer Styles Preview:
Step 4:
In a new layer, draw a horizontal white rectangle with the same dimensions as the orange rectangle.
Step 5:
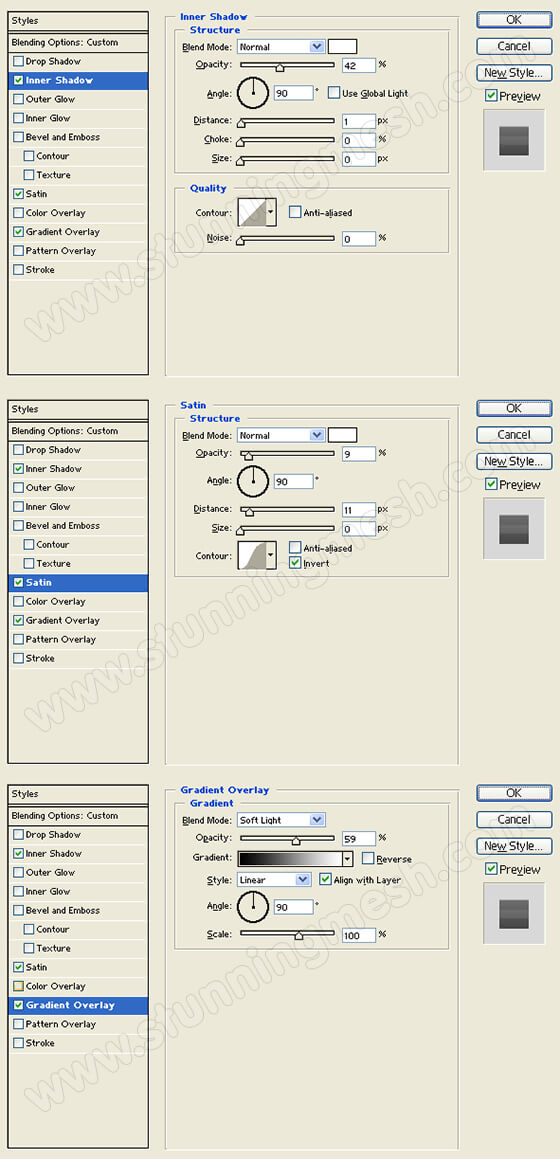
Apply an Inner Shadow, Satin, and Gradient Overlay layer styles to the horizontal white rectangle layer. Then, set the layer’s blending mode to Darken.
Layer Styles Preview:
Step 6:
Create a new layer. Draw a rounded rectangle with #FFFFC1 color shade for the tab shape on the navigation interface. Cut the bottom half of the rounded rectangle to form the tab.
Step 7:
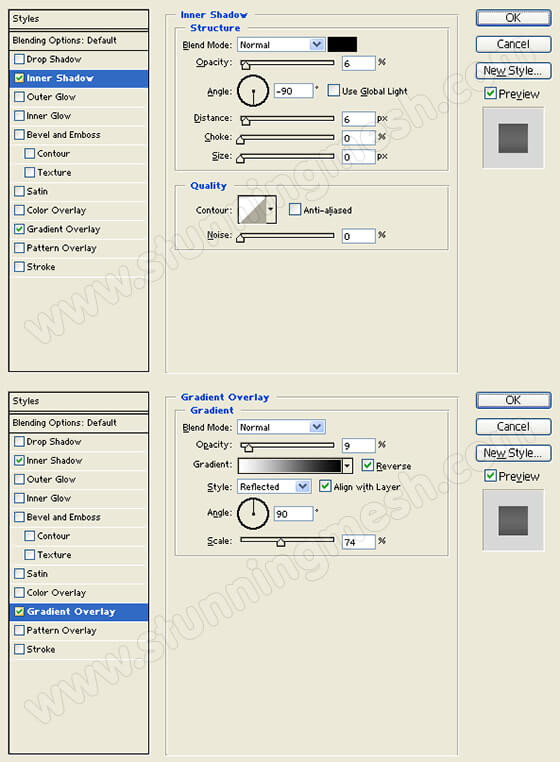
Add an Inner Shadow and Gradient Overlay styles to the cut out rounded rectangle layer.
Layer Style Preview:
Step 8:
In a new layer, draw an orange tab with #FF4D00 color shade.
Step 9:
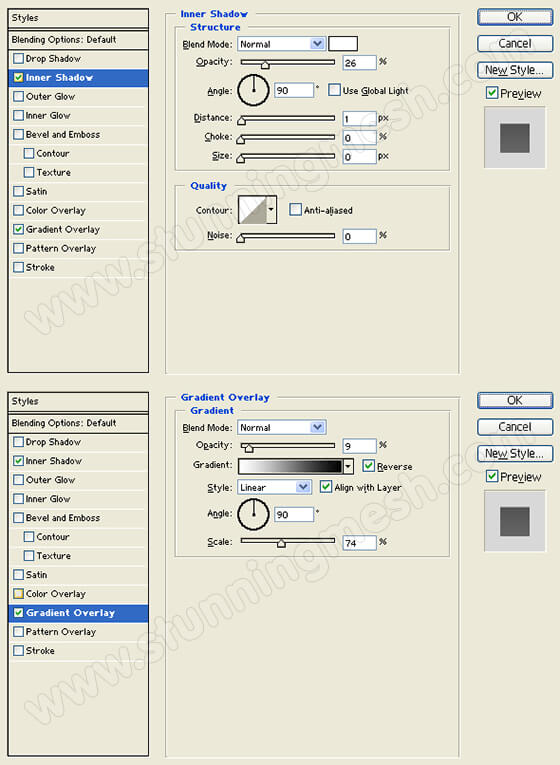
Add an Inner Shadow and Gradient Overlay styles to the orange tab layer. Use the settings provided on the step image below.
Layer Style Preview:
Step 10:
Add two more orange tabs on the interface design
Step 11:
Select the Horizontal Type Tool. On the Options Window, set the font family to Arial, style to Regular, size to 15 pt, anti-aliasing method to Crisp, and White for color. Now, left click in your canvas to create a new text layer, type your navigation links on the interface.
Step 12:
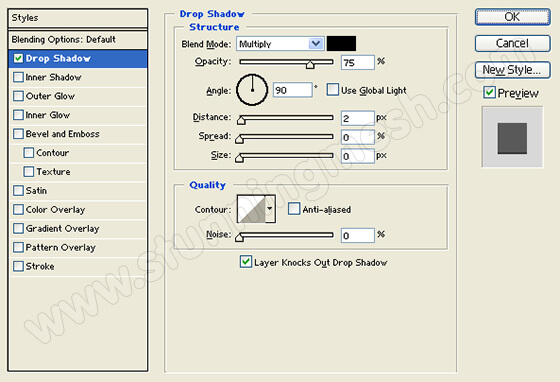
Add a Drop Shadow style to the navigation links text layer.
Layer Style Preview:
Final Image:
After putting some Social Media Icons and Search Box, with some other basic Links, here is the Final result of our Orange Header Design in Photoshop.
Now you can also enjoy Luggage Design in Photoshop Tutorial.

![Orange Header Design in Photoshop – [Photoshop Tutorial]](https://www.stunningmesh.com/wp-content/uploads/Orange-Header-Design-in-Photoshop-Result.jpg)











![Shotgun Shell Design in Photoshop – [Photoshop Tutorial]](https://www.stunningmesh.com/wp-content/uploads/Shotgun-Shell-in-Photoshop-Result-100x100.jpg)