Today we are going to work on a nice Photoshop Tutorial, in this tutorial we are going to work on Parchment Design in Photoshop. Parchment is a Durable Writing Surface in ancient and medieval times, made of usually a sheep or goat skin. In this Photoshop Tutorial, you will learn some tools, commands and techniques. So lets start Parchment design in Photoshop.
Here is Final Preview of what we are going to work in Photoshop:
Step 1: New File
Start out by creating a new file. Use the following settings; Dimensions: 1300×600 px, Resolution: 72dpi, Color Mode RGB color. Then, fill your background canvas to #303030 color using the Bucket Tool.
Step 2:
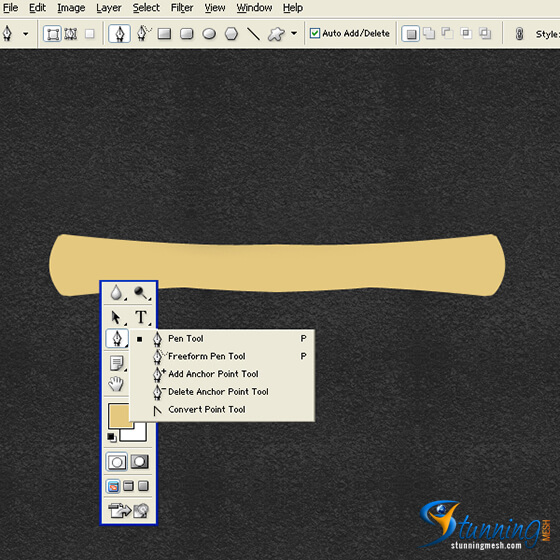
Create a new layer set and name it Scroll. Now, select the Pen Tool from the Tools Window. Then, on the Options Window, activate Fill Pixels and check Anti-Aliased. Create a new layer, using the Pen Tool, make the light brown (#E4C87F) shape for the wooden scroll as shown below.
light brown shape with #E4C87F and 353 x 35 px dimensions. Use the Fixed Size setting under Ellipse Options.
Step 3:
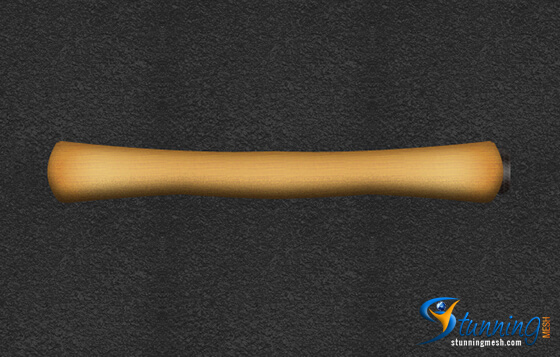
Add an Inner Shadow, Inner Glow, Satin, and Pattern Overlay styles to the light brown shape layer. Use the settings provided on the step image below.
Layer Styles Preview:
Step 4:
In the Layers Window, create a new layer under the wooden shape design. Then, draw a dark rounded rectangle with #1A120F color shade and 27 x 48 px dimensions. Position the dark rounded rectangle shape as shown below.
Step 5:
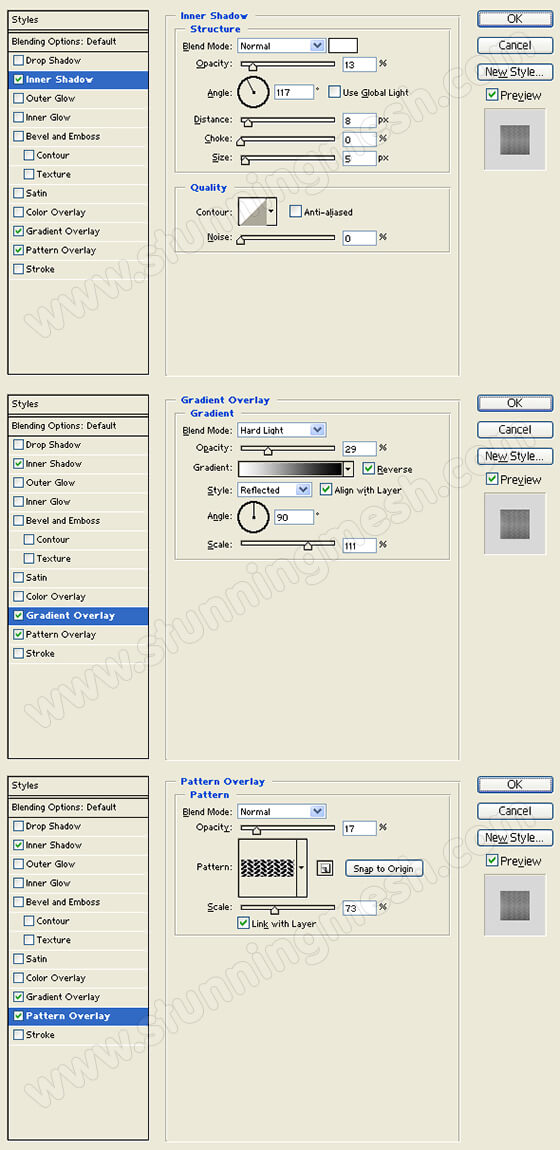
Add an Inner Shadow, Gradient Overlay, and Pattern Overlay styles to the dark rounded rectangle layer.
Layer Styles Preview:
Step 6:
Create a new layer behind the dark rounded rectangle layer. Then, draw a small ellipse with #614D4C color shade.
Step 7:
Add an Inner Shadow and Inner Glow styles to the small ellipse layer. Use the settings provided on the step image below.
Layer Style Preview:
Step 8:
Make the same type of designs on the opposite end of the wooden scroll.
Step 9:
Add a Satin and Gradient Overlay styles to the wooden scroll design layer.
Layer Style Preview:
Step 10:
On the Layers Window, create a new layer behind the scroll design layer. Then, draw a large rectangle with #F3DDAB color shade for the open scroll shape.
Step 11:
Add an Inner Shadow, Inner Glow, and Satin styles to the open scroll shape layer.
Layer Style Preview:
Step 12:
Duplicate the wooden scroll design layer and position on the bottom end of the scroll design.
Final Image:
So after giving some time and working hard, here is what we have, the final result of Parchment Design in Photoshop. Hopefully you enjoyed this Photoshop Tutorial and learn something by following this Tutorial.
Hope you enjoyed working on this awesome tutorial. Don’t forget to visit our another Photoshop Tutorial which is about Stylish Pencil Design in Photoshop.

![Parchment Design in Photoshop – [Photoshop Tutorial]](https://www.stunningmesh.com/wp-content/uploads/Parchment-Design-in-Photoshop-Result.jpg)


