This is yummy and mouthwatering Photoshop Tutorial because we are going to make M&M Chocolate Design in Photoshop. M&M Chocolate is not only the favorite of kids but adult also like it very much, so why not we try to make it in Photoshop? We will try to work hard to make M&M Chocolate Bean closer to reality, so lets start working on M&M Chocolate Design in Photoshop Tutorial.
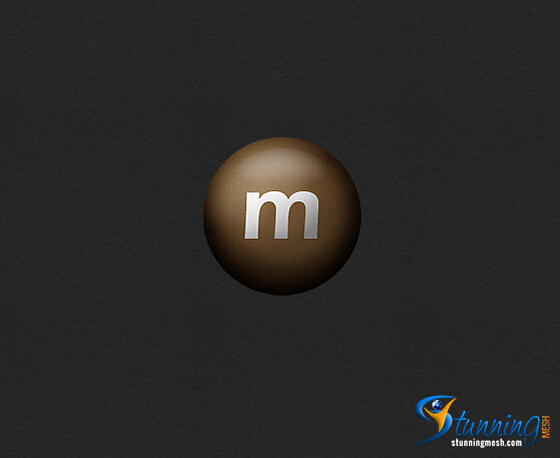
Lets have a look at the Final Result of our today’s Tutorial, M&M Chocolate Design in Photoshop:

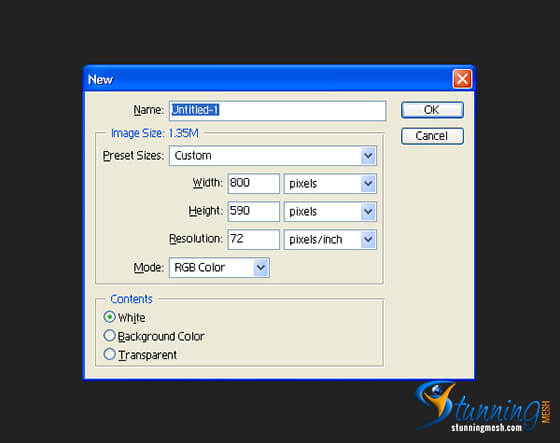
Step 1:
Let’s start out by creating a new file. I used a 800×600 pixels canvas set at 72dpi, and I filled my background with #242424 color shade using the Paint Bucket Tool.
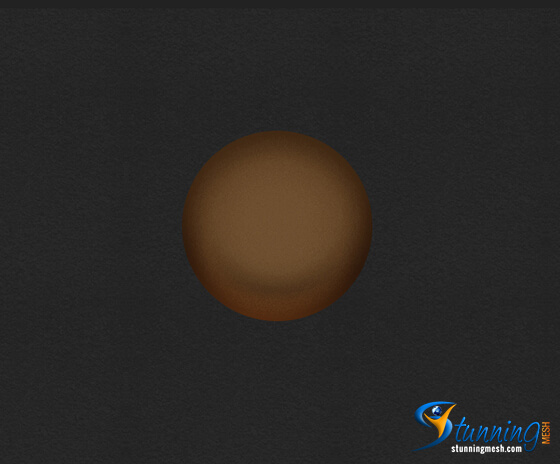
Step 2:
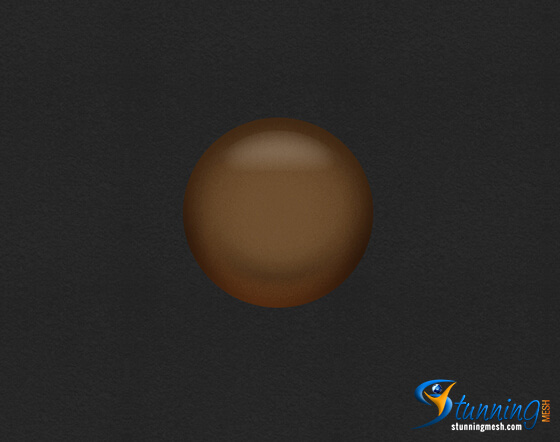
Create a new layer set, and name it MM (Layer > New > New Layer Set). In a new layer, draw a large brown circle with #513319 color shade and 204×204 px dimensions. Use the Fixed Size option inside the Ellipse Options to create the exact shape. Type in the dimensions in the setting box.

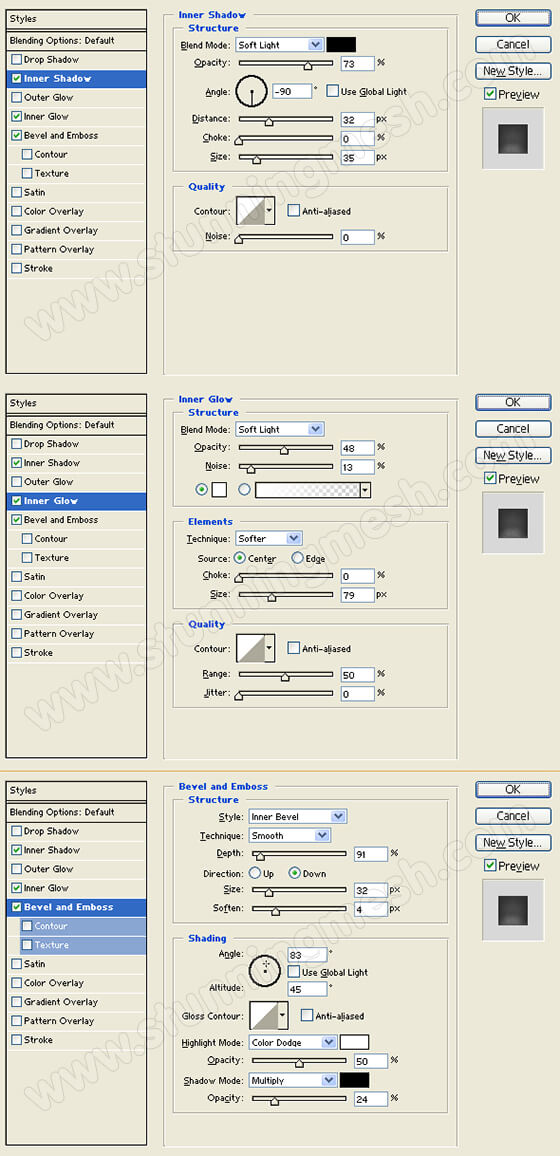
Step 3:
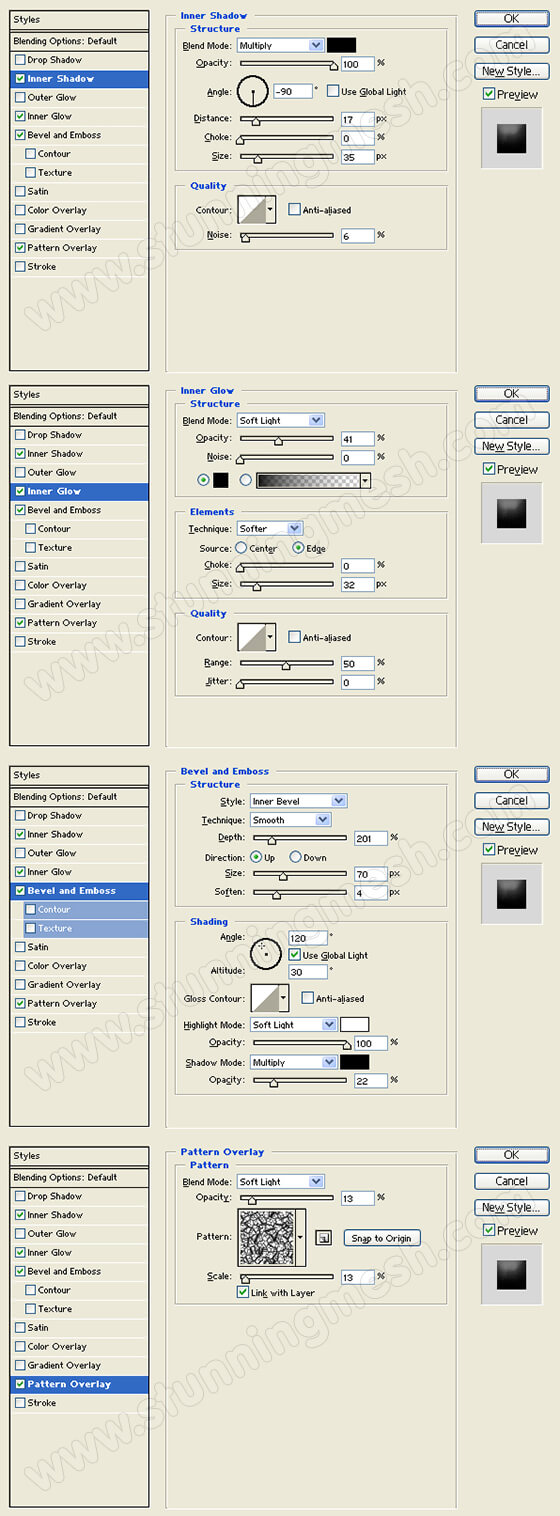
Apply an Inner Shadow, Inner Glow, and Bevel and Emboss layer styles to the brown circle layer.
Layer Styles Preview:
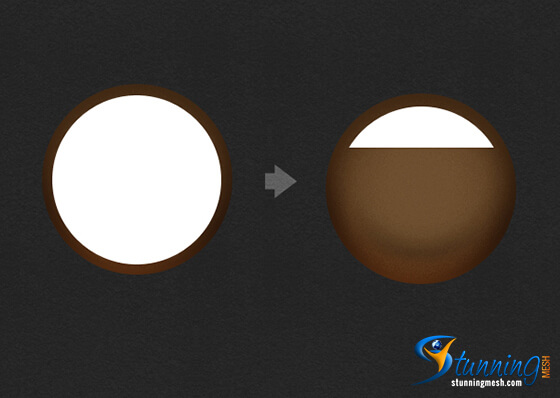
Step 4:
In a new layer, draw a white circle with 181×181 px dimensions. Then, cut the bottom part of the white circle as shown below.
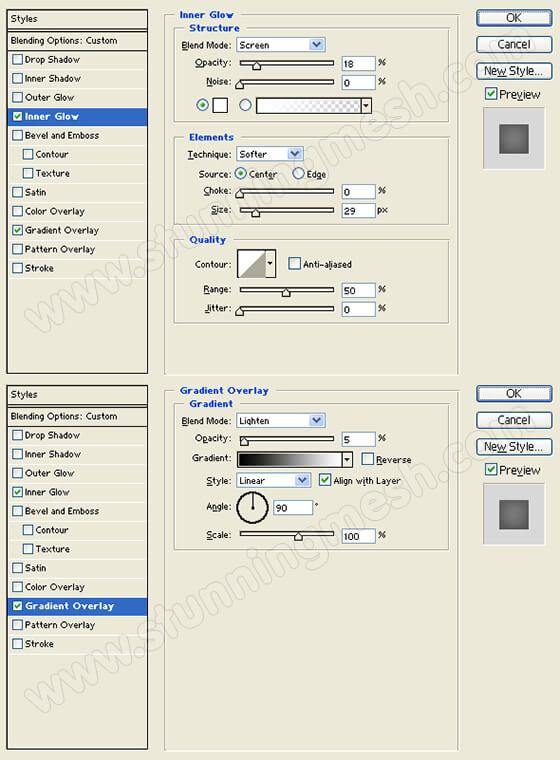
Step 5:
Add an Inner Glow and Gradient Overlay styles to the half circle layer. Then, set the layer’s blending mode to Lighten.
Layer Styles Preview:
Step 6:
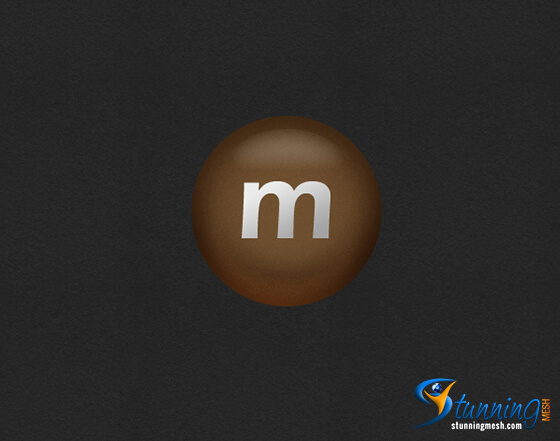
Select the Horizontal Type Tool. On the Options Window, set the font family to Eras Demi ITC, regular, 120pt, sharp and white color shade. In a new text layer, type m on the circle design.

Step 7:
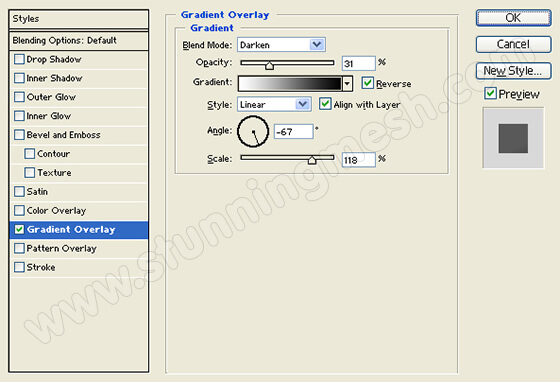
Add a Gradient Overlay style to the text layer.
Layer Style Preview:
Step 8:
Highlight the M&M layer set and go to Layer > Merge Layer Set. The layer set should transform into a regular layer. Now apply an Inner Shadow, Inner Glow, and Bevel and Emboss layer styles to the M&M design layer.
Layer Styles Preview:
Step 9:
Create a new layer and merge it with the M&M design layer. Then, cut parts of the M&M design using the Pen Tool or the Lasso Tool .
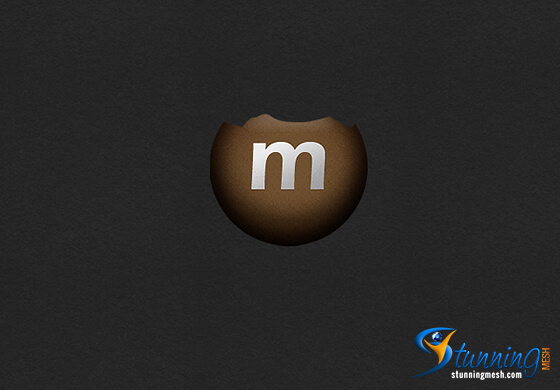
Step 10:
Create a new layer. Then, use the Ellipse Tool and draw a #0291600 color shade shape behind the cut out parts of the M&M design.

Step 11: Shadow
Select the Brush Tool and set the brush size to large. Then, create a new layer behind the M&M design and add a spotlight shadow.
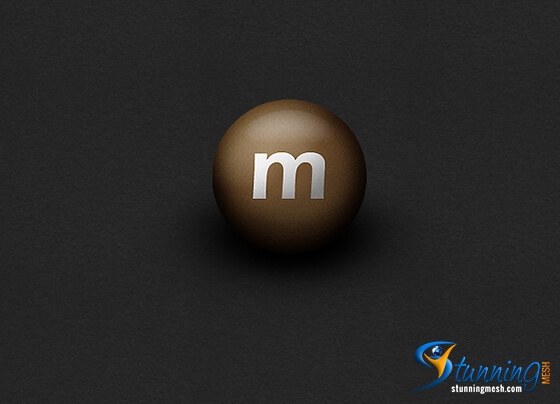
Final Image:
So after giving shadow, I’ve put both the Beans side by side, here is the result of our Hard Work and Time consuming Photoshop Tutorial.
If you liked this Photo Tutorial then don’t forget to visit our Parchment Design Tutorial in Photoshop.
![Shotgun Shell Design in Photoshop – [Photoshop Tutorial]](https://www.stunningmesh.com/wp-content/uploads/Shotgun-Shell-in-Photoshop-Result-100x100.jpg)