
Today we are going to create an I-Pod in Photoshop, we will not be going in Detail, it will be very simple and hopefully you will enjoy making it.
1. Lets start with a new File of size 560 x 400 px with light Background. Draw a slight rounded rectangle on it by using Rectangular Tool ![]() :
:

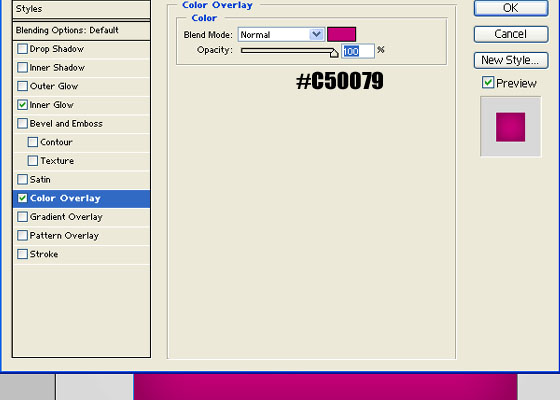
2. Now we are going to fill the color, run the command Layer >> Layer Style >> Color Overlay and give the color number #C50079:
3. Click on Inner Glow and Give the following Setting:

4. Now Hit Ok and then Draw another Rounded Rectangle, almost half in Height and slight shorter in Width, give it Black color, like:

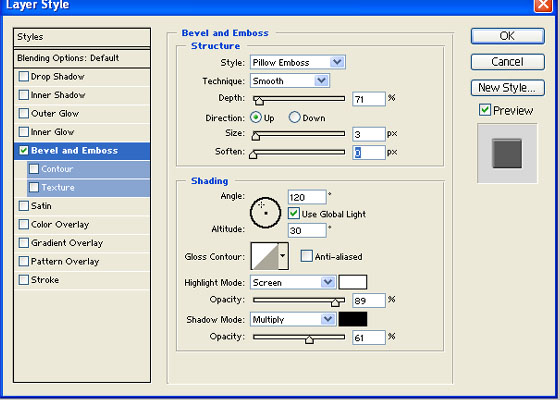
5. Run the command, Layer >> Layer Style >> Bevel and Emboss and give the following settings:
6. Now draw another Rounded Rectangle smaller in size and lighter in Color, like shown below:

7. Now pick Elliptical Tool and draw a Circle in white color just below the Black screen, (to move it in the center press Ctrl+A and pick Move tool and from property panel select Center Horizontally)

8. Now type the text, MENU, VOL and Arrow Keys (you can pick these Shapes from Custom Shape icon):

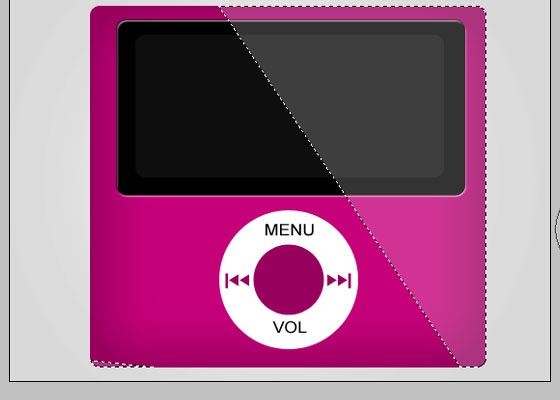
9. Select your first Rectangular Shape layer (purple one) and hold Ctrl key and click on its Thumbnail from Layer panel, it will bring marquee around the rectangle:

10. Create new layer and pick Polygonal Lasso tool ![]() and hold Alt key and remove the left portion of the selection and fill it with white and then reduce the opacity of this layer to 20%:
and hold Alt key and remove the left portion of the selection and fill it with white and then reduce the opacity of this layer to 20%:
After pressing Ctrl+D (Deselect) you will get this:

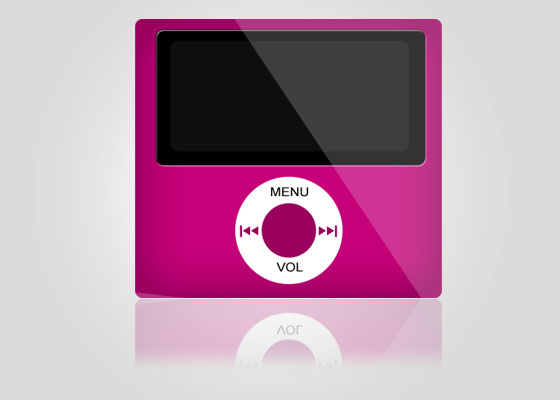
11. Now you can give some Details by showing its shadow, here you will get final I-Pod in Photoshop:
It was really Simple and Attractive Adobe Photoshop Tutorial, hopefully you liked it, if so then don’t forget to tell us by writing your commend in the following Comment Box.

