I’m going to make Water Drops in Illustrator, if you don’t know how to make water drops then here I’m going to tell you. It will give dew drops over Glass of window look. Some new commands, tools and new techniques for you in this tutorial.
1. Before starting it, I’m going to select some colors and will be using in the background. Go to Window >> Swatches and select some colors, you can chose any colors of your own desire, as I brought some blue shades and then hitting first color then holding Ctrl key and then clicking on 5 other colors, like I’ve chosen light blue to dark blue colors:

2. Draw a Rectangle by using Rectangle Tool ![]() and go to Object >> Create Gradient Mesh, give the following settings:
and go to Object >> Create Gradient Mesh, give the following settings:

you will get this result after hitting OK:

3. Select Direct Selection tool ![]() from the tool bar, just click on the Rectangle, a Grid will display, click on that point where column and rows are intersecting each other. Shape handles would come, just hold any shape handle and change its position, like this change different points to make Unconstrained shape like shown below:
from the tool bar, just click on the Rectangle, a Grid will display, click on that point where column and rows are intersecting each other. Shape handles would come, just hold any shape handle and change its position, like this change different points to make Unconstrained shape like shown below:

4. This kind of result should come:

5. Now use the Ellipse tool ![]() and draw different circles with white color and change some circle’s opacity to different values, so you must have this kind of circles:
and draw different circles with white color and change some circle’s opacity to different values, so you must have this kind of circles:

6. Select all these circles and go to Effect >> Blur >> Gaussian Blur and give radius as 5:

Circles would become like this:

7. Now we are going to create Drops, so by using Ellipse tool, draw a shape like shown below (having our darkest Blue color, as we have selected in first step):

8. Create another ellipse at the bottom of this circle, smaller in size and having white color:

9. Select the smaller circle and go to Effect >> Blur >> Gaussian Blur and give 6px:

10. Now create another shape for glassy effect:

11. Now I’ve created two more ellipse like shown below, but having different colors, I’ve made the groups of each drop:

12. Now we are going to make the symbol of these ellipses, first select the Dark Drop and hit F8 key. A box will appear, write any name, select Graphic in the Type and hit ok. Like this save other two ellipses too:

13. Now its time to call these Ellipses and use them as Spray. Just select your first Drop (Dark one) a box will appear around it. Now press Shift+S (or select Symbol Spray Tool ![]() ). Now hold left key and move the mouse pointer, it will spray Dark ellipse. Then select lighter ellipse and then use this spray. In the last select lighter ellipse and then spray it, so you will get these drops as:
). Now hold left key and move the mouse pointer, it will spray Dark ellipse. Then select lighter ellipse and then use this spray. In the last select lighter ellipse and then spray it, so you will get these drops as:

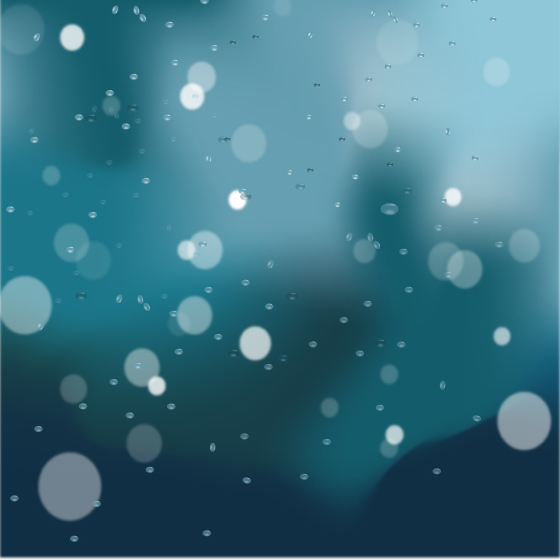
14. Now select all the drops and reduce the size:

15. Duplicate these drops some time and then change the angle and position to fill the whole area:
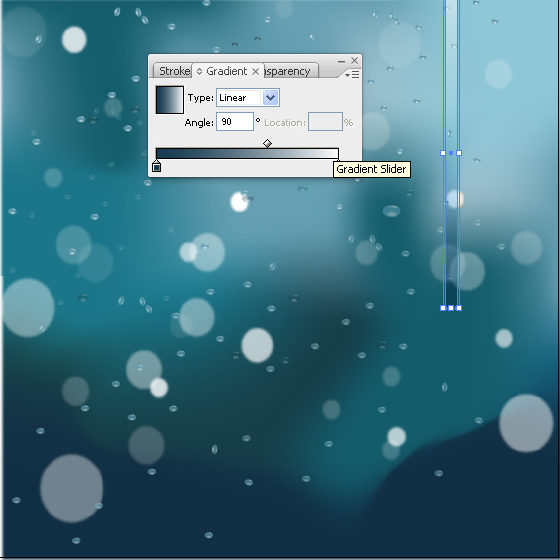
16. Now you can make different shapes over it, like I’ve made Rectangle. Give it Gradient and then change the blending mode to Screen and reduce the opacity to 50%:
17. Now pick Wrap Tool ![]() (Shift+R) change the shape of rectangle to unconstrained, like shown below:
(Shift+R) change the shape of rectangle to unconstrained, like shown below:

18. I’m going to type my Text over it, like I’ve typed Stunning Mesh in Scriptina Font with black color:

19. Change the blending mode of Text to Overlay. Now I’m going to copy and paste the shape I just made, then I’m going to reduce its size and then changing the position:

Here is the final look: