
This is very long tutorial, by using this tutorial you can make Cartoon Character in Illustrator. You can make changes accordingly.
1. Take new file in Adobe Illustrator and create a rectangle by using Rectangle Tool ![]() . Then fill it with Gradient (it will be your own choice so I’ve used the following Gradient):
. Then fill it with Gradient (it will be your own choice so I’ve used the following Gradient):

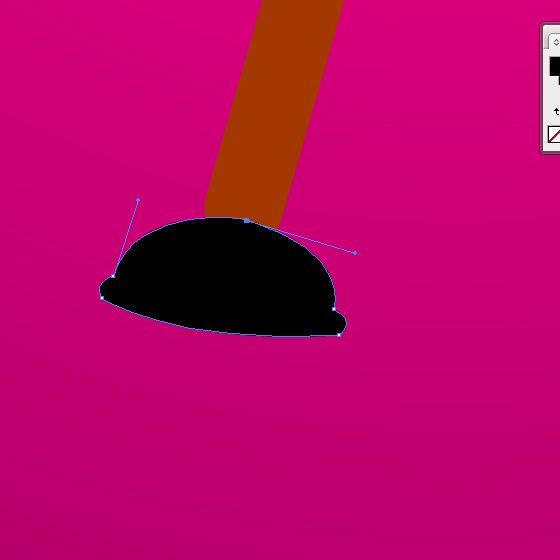
2. Now I’m going to create Cartoon’s body area. Pick Pen tool ![]() and draw the following shape:
and draw the following shape:

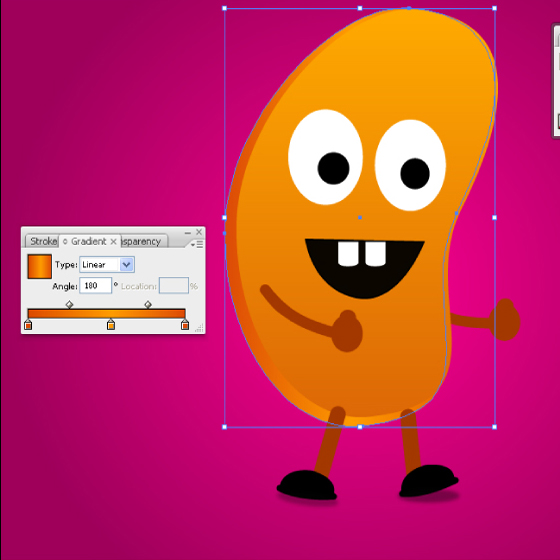
3. Now fill it with any Gradient, I’ve used the following:

4. Now I’m going to create its left Eye. Pick Ellipse Tool ![]() and draw an eye at proper place, fill it with white as shown below:
and draw an eye at proper place, fill it with white as shown below:

5. Now I’m going to create eye ball, again pick Ellipse tool and draw a smaller Circle this time and fill it with Black and place it on proper position:

6. Now duplicate these two ellipses and place these towards right side to complete second Eye:

7. Now I’m going to create the Face. You can use either Ellipse tool or Pen tool to create the face, like shown below:

8. Its time to create its Teeth, I’m using Rectangle tool ![]() to make its two Teeth:
to make its two Teeth:

9. To give these rectangle a proper look of Teeth, I’m going to convert its bottom line from straight to Curve. Pick Sub Selection Tool and convert bottom lines from straight to curves, like:

8. So far we have made this:

9. Now pick Line Tool ![]() and draw a line and give the outline a size and color (it will depend upon the size of your Cartoon Character, I’ve use the following size and color):
and draw a line and give the outline a size and color (it will depend upon the size of your Cartoon Character, I’ve use the following size and color):

10. Duplicate this line and place on the appropriate positions, these would be the Arms and legs of the character:

11. Now I’m going to create the Hands, make two circles:

12. Give color of your own choice to Arms and Hands:

13. By using Pen Tool I’m going to create Shoes:
14. Copy this shoe and past it at the bottom of other leg. Again duplicate both these shoes and by using Effect >> Blur and give the Gaussian Blur. To make Shadow like this:

15. Duplicate the Body and place it behind and left side and reverse the Gradient:
This kind of effect should come:

16. For some detailing I’ve made some circles on the head, and having different size and reduce the opacity to 20%:

17. Now I’m going to work on Shoes, by using Pen tool draw a shape like shown below and fill it with White color:

18. Reduce the opacity to 20% and see the look:

19. Now I’m gong to make Tongue, by using Pen tool draw a shape and fill it with color of your own choice:
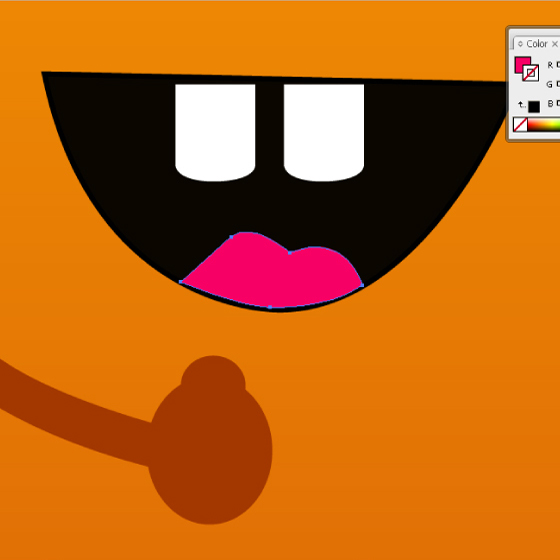
Here is the Character so far:

20. Now by using Star tool ![]() make a star having 4 corners, fill it with white color.
make a star having 4 corners, fill it with white color.

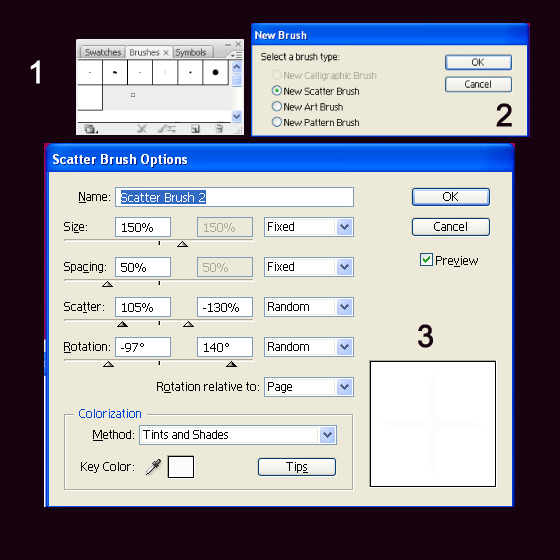
21. Open Brush panel (by using Window >> Brushes) and drag your star and drop it inside the Brush Panel. A box will appear, select New Scatter Brush (following Picture 2). After hitting ok another box will come, give the settings of Picture 3 at bottom and hit ok:
22. Select the Brush tool ![]() and make stars as shown below:
and make stars as shown below:

23. I’ve created some bigger stars like shown below, so we would be having the final Cartoon Character:


good tut
thank u ..that was very useful
This is brilliant.Not only the tutorial which is really productive, but also the cartoon character.I haven’t used Illustrator even once…will give it a try.
really beautiful illustration you create in this short but productive tutorial.