
I’ve already made this kind of effect, but here I’ve changed technique to give another look. Here we are going to make some kind of Spinning Fire Behind Text while using Adobe Photoshop software, hopefully you will find it different from my previous effect.
1. Take any Squared size file with Black background. Then put your desire text over it having white color, like:

2. Duplicate this text layer and then merge the original text with Background layer. Hide the copied text layer. Now run the command Filter >> Distort >> Polar Coordinate and select Polar to Rectangular:

3. Run the command Filter >> Stylize >> Wind and select From the Left and press the Ctrl + F two or three time to repeat the effect:
4. Now again go to Filter >> Stylize >> Wind this time we are selecting From the Right and press Ctrl +F Two or Three Times:

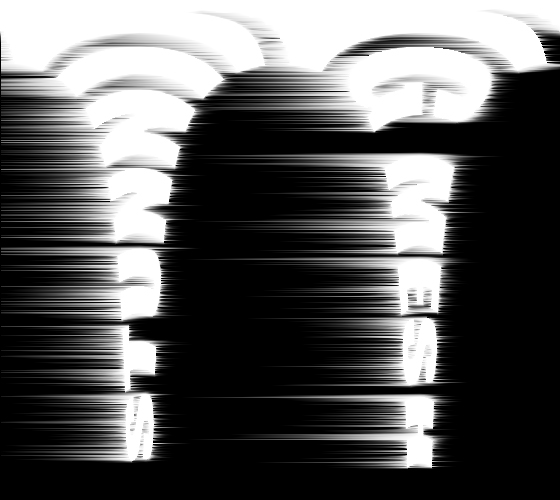
5. Now run the command Filter >> Distort >> Polar Coordinate and select Rectangular to Polar.

6. Create new Layer and Draw gradient like shown below: (Yellow #fff603, Red #fe0000)

7. Now go to Layer Panel and change blending mode from Normal to Linear Burn and see the effect:

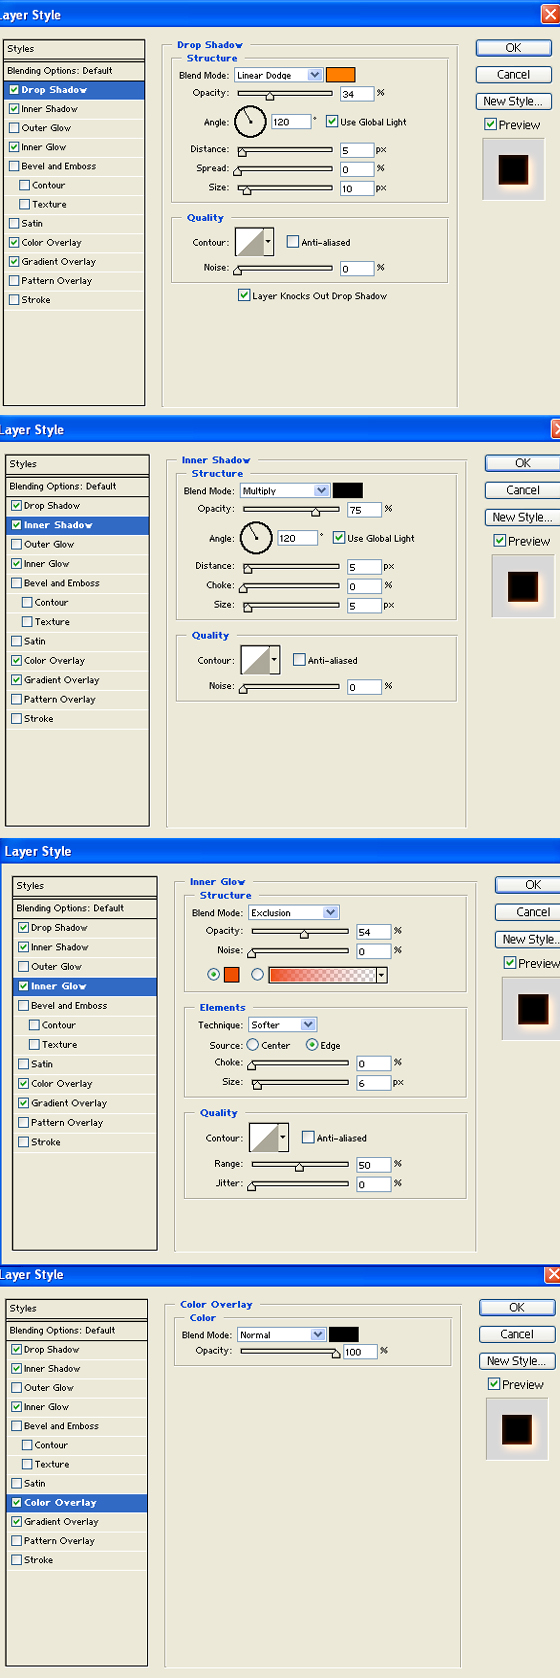
8. Now open text layer which is invisible, and give these Layer styles one by one: (By using the command Layer >> Layer Style >> Drop Shadow, Inner Shadow, Inner Glow, Color Overlay, Gradient Overlay one by one)
10. Final Result of Spinning Fire Behind Text in Photoshop should look like this:

Hope by working on this Simple but Awesome and Attractive Photoshop Tutorial you have learnt something from it. Some basic Command and Tool discussed in this Tutorial so if you are new in Designing Field you should be familiar from these commands and tools. Enjoy watching and working on our other Photoshop Tutorials. Keep visiting us and giving us your Precious views in the comment box below.


Great text designs 🙂